

こんにちは。AWS CLIが好きな福島です。
今回は、Trend Micro Cloud One Workload Security(以下、C1WS)のDeep Security Agent(DSA)を WindowsおよびLinuxに導入する手順を備忘録として、ブログに記載いたします。
どちらもインストールスクリプトを流すだけで簡単に導入ができます。
参考:https://files.trendmicro.com/jp/ucmodule/C1WS/C1WS_InstallGuide_20200813.pdf
DSAのインストール(Windows)
DSAのインストール方法は2パターンありますが、今回は、①で実施しました。
※おそらく、①の方が簡単です。
①C1WSで作成したインストールスクリプトを実行
②インストールEXE/MSIをダウンロードインストールしプロンプトでDSM登録
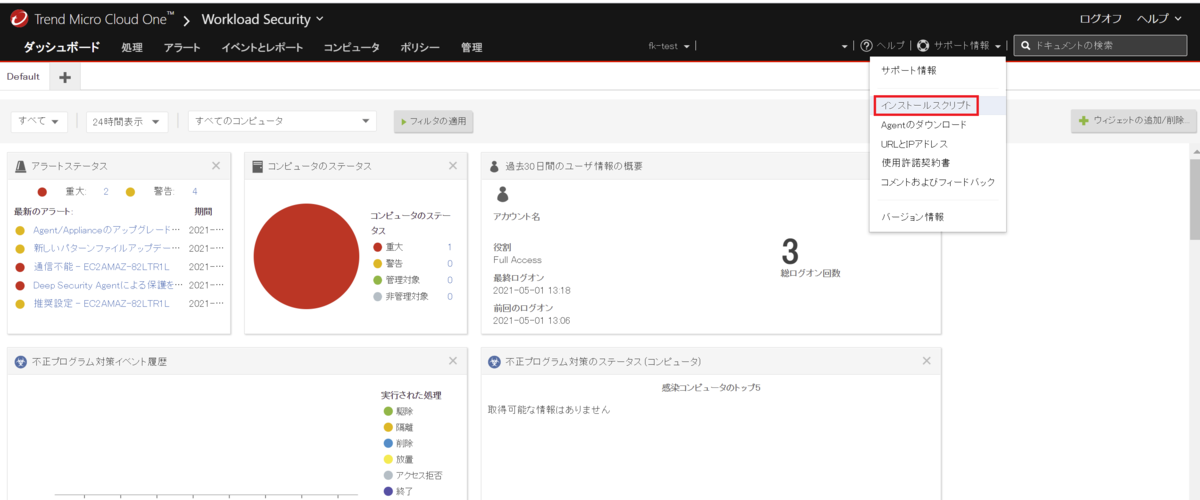
①「ヘルプ」→「インストールスクリプト」をクリックします。
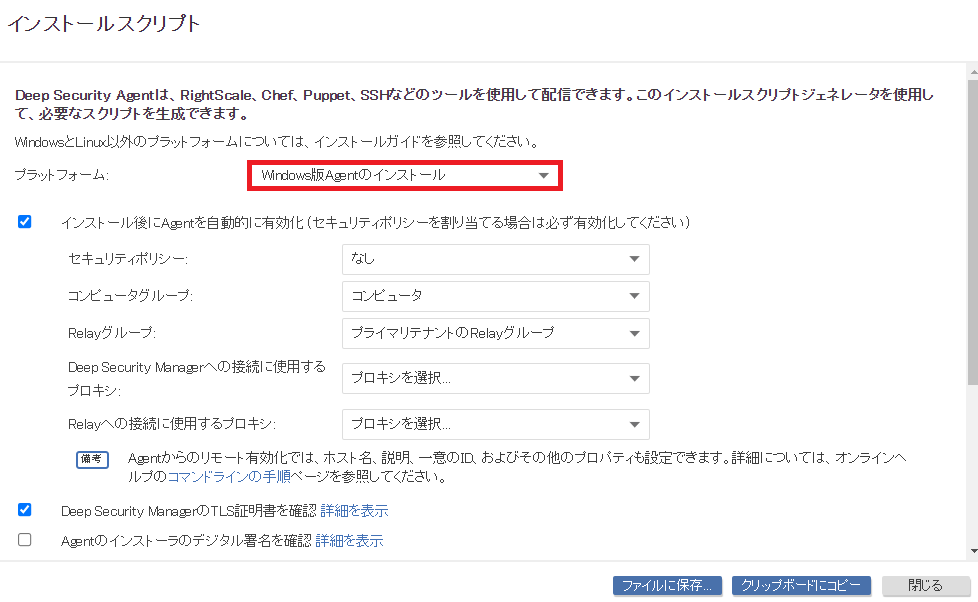
②以下を変更し、「ファイルに保存」をクリックします。(クリップボードにコピーも可能です。)
プラットフォーム:Windows版Agentのインストール
※Agentのインストーラのデジタル署名を確認やプロキシの設定は、任意で行います。
③対象サーバにファイルをアップロードし、Powershellでスクリプトを実行します。
実行コマンド
powershell C:\Users\Administrator\Desktop\AgentDeploymentScript.ps1
実行結果
PS C:\Users\Administrator> powershell C:\Users\Administrator\Desktop\AgentDeploymentScript.ps1


    ディレクトリ: C:\Users\Administrator\AppData\Roaming\Trend Micro\Deep Security Agent


Mode                LastWriteTime         Length Name
----                -------------         ------ ----
d-----       2021/05/01      4:47                installer
トランスクリプトが開始されました。出力ファイル: C:\Users\Administrator\AppData\Roaming\Trend Micro\Deep Security Agent\installer\dsa_deploy.log
4:47:00 - DSA download started
4:47:00 - Download Deep Security Agent Package
https://app.deepsecurity.trendmicro.com:443/software/agent/Windows/x86_64/agent.msi
4:47:09 - Downloaded File Size:
28086272
4:47:09 - DSA install started
4:47:09 - Installer Exit Code:
0
4:47:17 - DSA activation started
HTTP Status: 200 - OK
Activation will be re-attempted 30 time(s) in case of failure
dsa_control
HTTP Status: 200 - OK
Response:
Attempting to connect to https://agents.deepsecurity.trendmicro.com:443/
SSL handshake completed successfully - initiating command session.
Connected with ECDHE-RSA-AES256-GCM-SHA384 to peer at agents.deepsecurity.trendmicro.com
Received a 'GetHostInfo' command from the manager.
Received a 'SetDSMCert' command from the manager.
Received a 'SetAgentCredentials' command from the manager.
Received a 'GetAgentEvents' command from the manager.
Received a 'SetAgentStatus' command from the manager.
Received a 'GetInterfaces' command from the manager.
Received a 'GetAgentEvents' command from the manager.
Received a 'GetAgentStatus' command from the manager.
Received a 'GetAgentEvents' command from the manager.
Received a 'GetDockerVersion' command from the manager.
Received a 'SetXDRInformation' command from the manager.
Received a 'SetSecurityConfiguration' command from the manager.
Received a 'GetAgentEvents' command from the manager.
Received a 'GetAgentStatus' command from the manager.
Received a 'SetDSMCACert' command from the manager.
Received a 'GetIoT' command from the manager.
Received a 'GetConfiguration' command from the manager.
Command session completed.
トランスクリプトが停止されました。出力ファイル: C:\Users\Administrator\AppData\Roaming\Trend Micro\Deep Security Agent\installer\dsa_deploy.log
4:48:14 - DSA Deployment Finished


PS C:\Users\Administrator>
④C1WSコンソールの「コンピュータ」タブをクリックし、対象サーバが表示されていることを確認します。

DSAのインストール(Linux)
Windows同様、DSAのインストール方法は2パターンありますが、今回は、①で実施しました。
※おそらく、①の方が簡単です。
①C1WSで作成したインストールスクリプトを実行
②インストールパッケージをダウンロード&インストールしC1WS登録
①「ヘルプ」→「インストールスクリプト」をクリックします。
②以下を変更し、「クリップボードにコピー」をクリックします。(ファイルに保存も可能です。)
プラットフォーム:Linux版Agentのインストール
※Agentのインストーラのデジタル署名を確認やプロキシの設定は、任意で行います。

③クリップボードにコピーしたデータを任意ファイル名に貼り付けます。
$ vi install.sh
④実行権限を付与します。
$ chmod 755 install.sh
⑤スクリプトを実行します。
$ sudo ./install.sh
Downloading agent package...
Installing agent package...
warning: /tmp/agent.rpm: Header V4 RSA/SHA256 Signature, key ID e1051cbd: NOKEY
Preparing...                          ################################# [100%]
Host platform - NAME="Amazon Linux"
Updating / installing...
   1:ds_agent-20.0.0-2204.amzn2       ################################# [100%]
add ds_agent service with chkconfig
Starting ds_agent (via systemctl):  [  OK  ]
Install the agent package successfully
HTTP Status: 200 - OK
Activation will be re-attempted 30 time(s) in case of failure
dsa_control
HTTP Status: 200 - OK
Response:
Attempting to connect to https://agents.deepsecurity.trendmicro.com:443/
SSL handshake completed successfully - initiating command session.
Connected with (NONE) to peer at agents.deepsecurity.trendmicro.com
Received a 'GetHostInfo' command from the manager.
Received a 'SetDSMCert' command from the manager.
Received a 'SetAgentCredentials' command from the manager.
Received a 'GetAgentEvents' command from the manager.
Received a 'SetAgentStatus' command from the manager.
Received a 'GetInterfaces' command from the manager.
Received a 'GetAgentEvents' command from the manager.
Received a 'GetAgentStatus' command from the manager.
Received a 'GetAgentEvents' command from the manager.
Received a 'GetDockerVersion' command from the manager.
Received a 'SetXDRInformation' command from the manager.
Received a 'SetSecurityConfiguration' command from the manager.
Received a 'GetAgentEvents' command from the manager.
Received a 'GetAgentStatus' command from the manager.
Received a 'SetDSMCACert' command from the manager.
Received a 'GetIoT' command from the manager.
Received a 'GetConfiguration' command from the manager.
Command session completed.
$
⑥C1WSコンソールの「コンピュータ」タブをクリックし、対象サーバが表示されていることを確認します。

終わりに
WindowsおよびLinuxに導入する手順を備忘録として、ブログにまとめてみました。