

こんにちは。AWS CLI の福島です。
今回は、 AWS が提供しているサンプルアプリを基に、以下2点の実装方法をご紹介します。
- AWS Amplify 利用時における Cognito と EntraID の SAML 連携設定
- ログイン/ログアウト画面の作成
- 参考
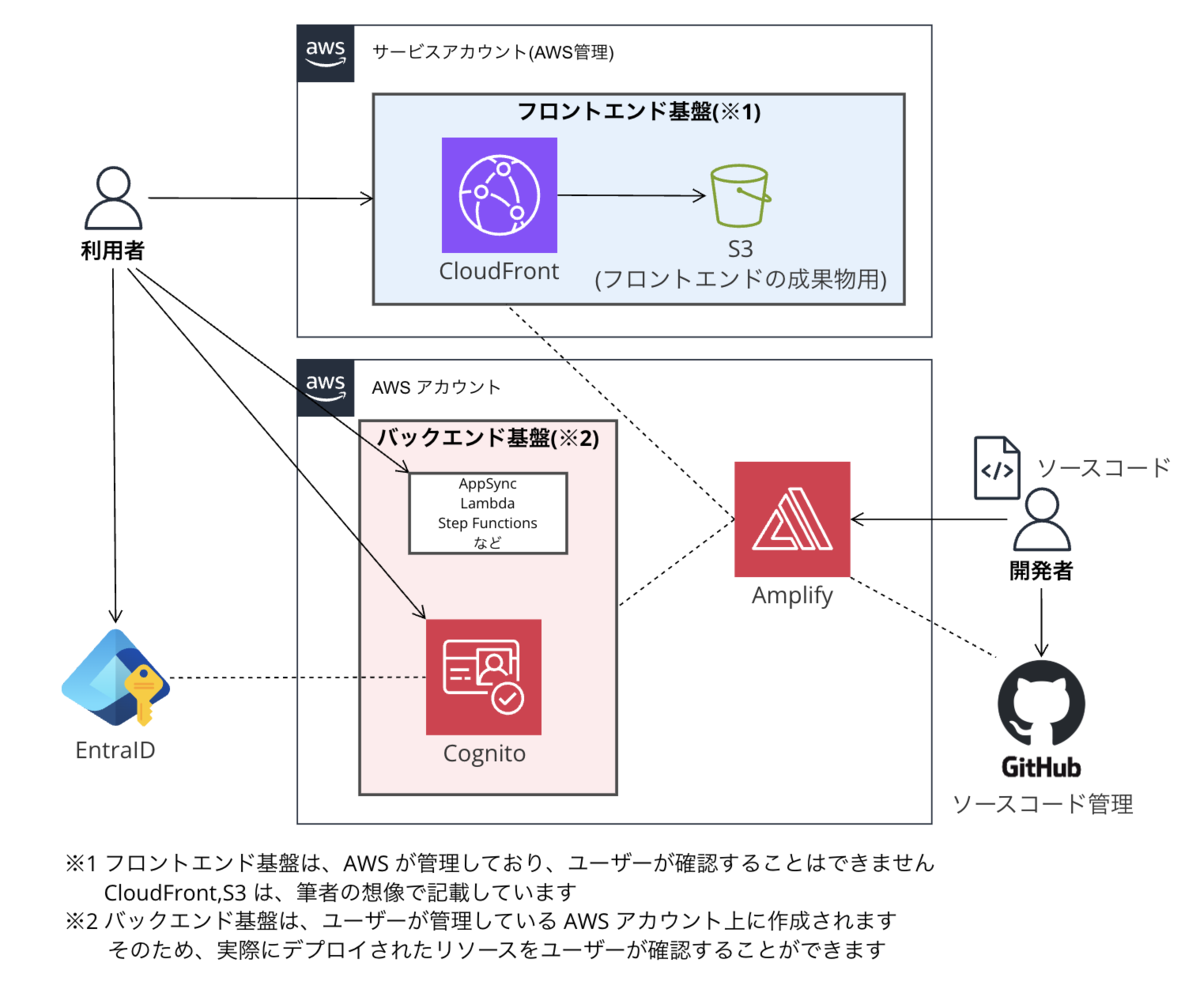
- 概要図
- やること
- サンプルリポジトリから新しいリポジトリの作成
- Amplifyのセットアップ(サンプルコードの初回デプロイ)
- Cognito のログアウト及びコールバック URL の設定
- SAML 連携設定(EntraID)
- SAML 連携設定(Cognito)
- オプション) EntraID への Cognito 署名証明書 のアップロード
- フロントエンドの更新
- Appendix) ログイン画面の作成
- Appendix) ログアウト画面の作成
- 終わりに
参考
概要図
やること
- サンプルリポジトリから新しいリポジトリの作成
- Amplifyのセットアップ(サンプルコードの初回デプロイ)
- Cognito のログアウト及びコールバック URL の設定
- SAML 連携設定(EntraID)
- SAML 連携設定(Cognito)
- オプション) EntraID への Cognito 署名証明書 のアップロード
- フロントエンドの更新
- Appendix) ログイン画面の作成
- Appendix) ログアウト画面の作成
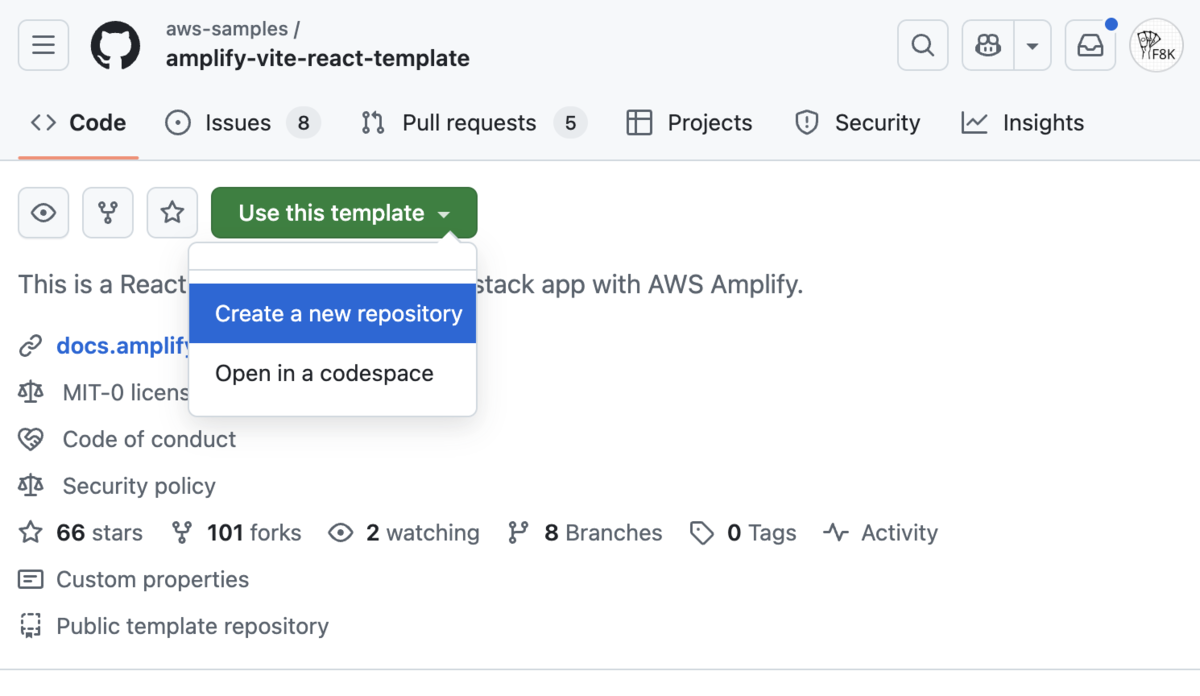
サンプルリポジトリから新しいリポジトリの作成
- サンプルコードの URL にアクセス
https://github.com/aws-samples/amplify-vite-react-template
- 「Use this template」>「Create a new repository」を押下
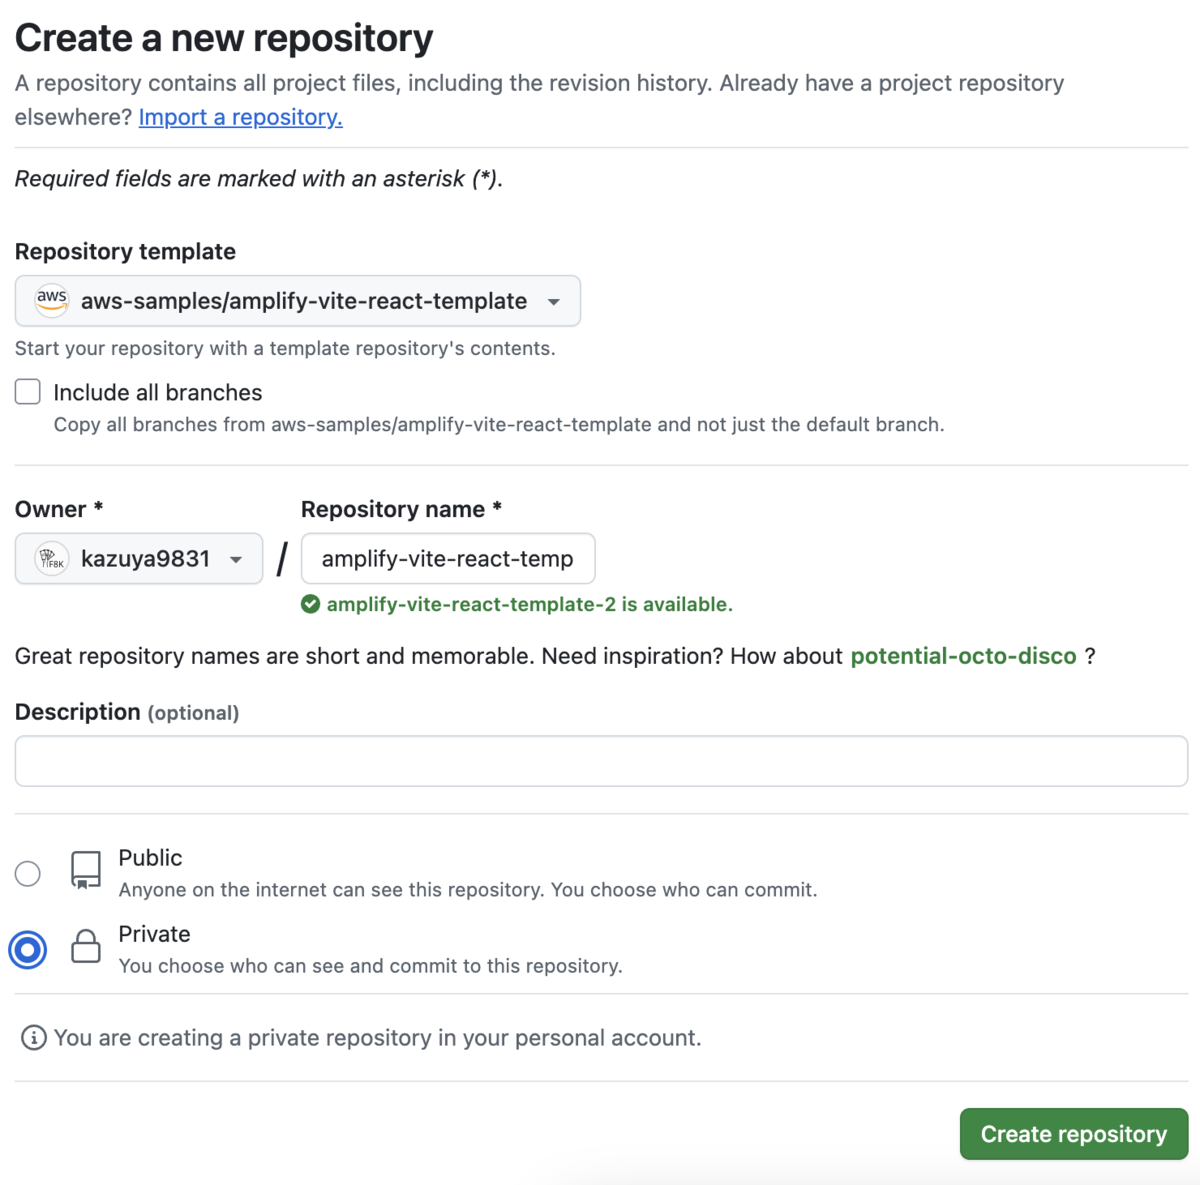
- 「Repository name」の入力および「Private」にチェックを付け、「Create repository」を押下
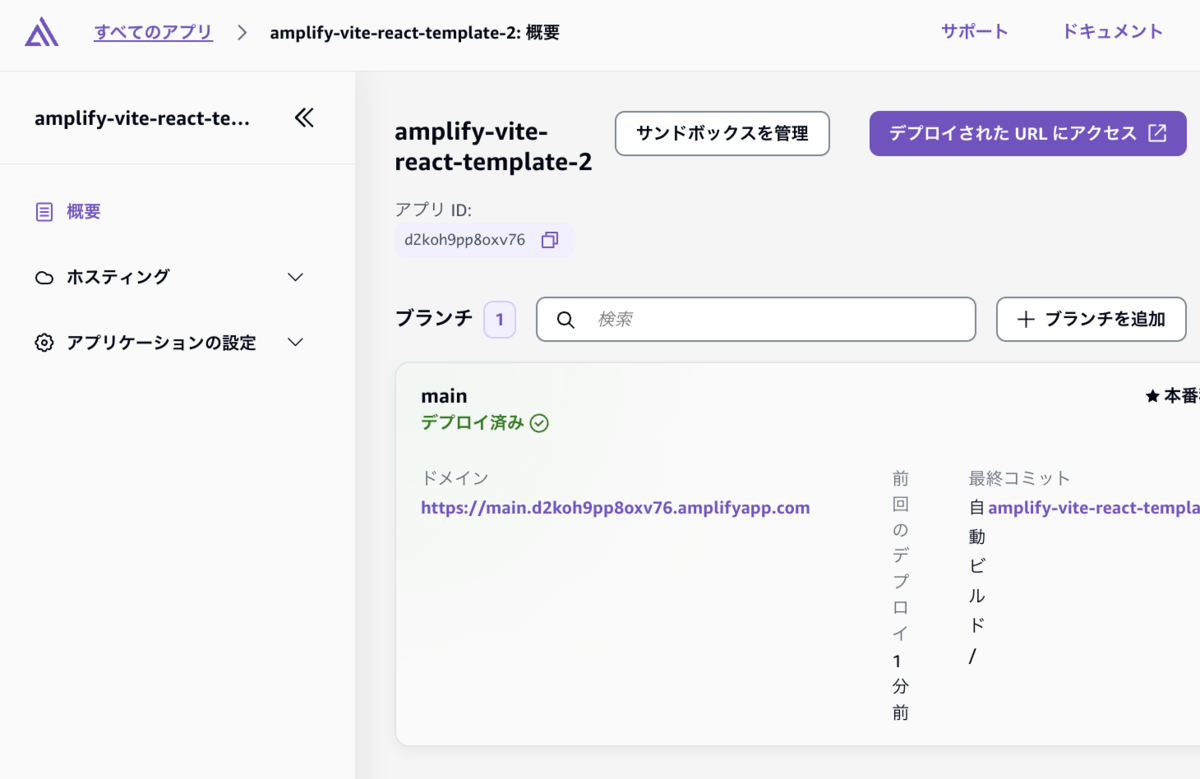
Amplifyのセットアップ(サンプルコードの初回デプロイ)
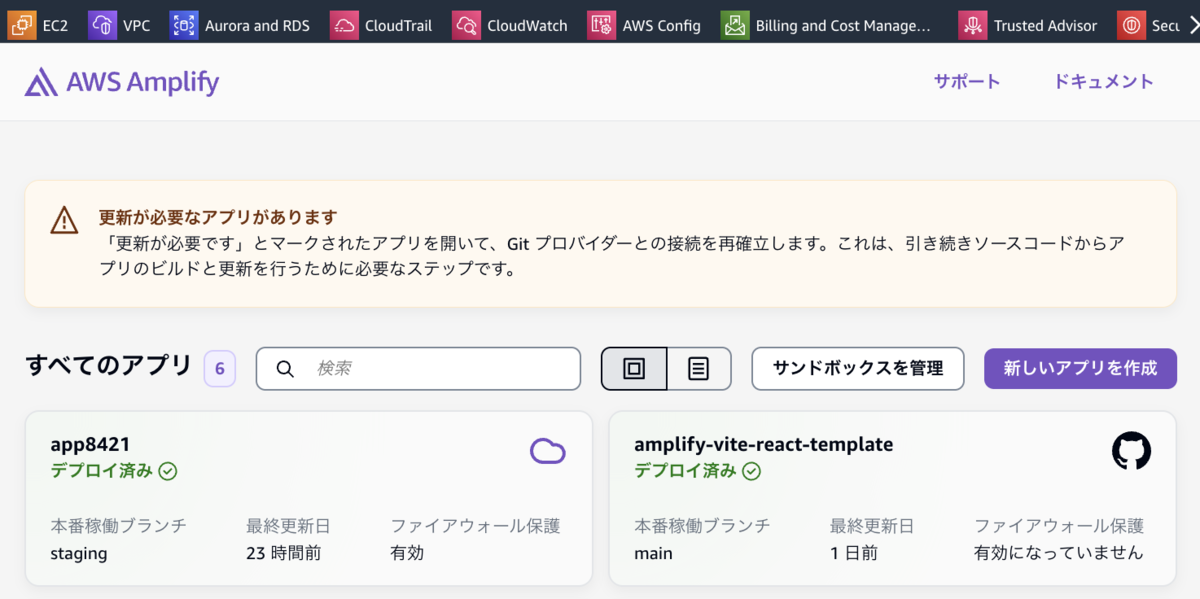
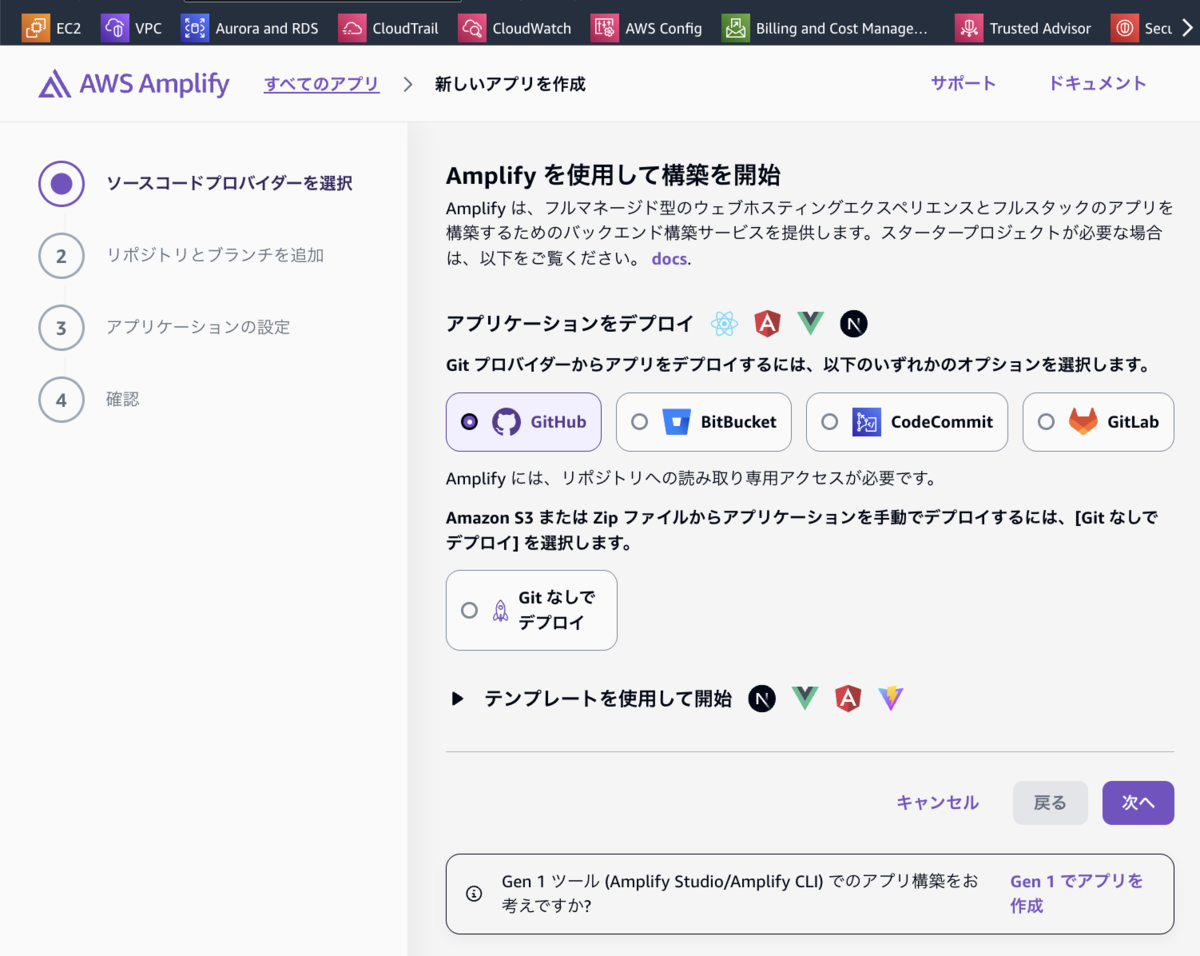
- Amplify のコンソールに移動し、「新しいアプリを作成」を押下
- GitHub を選択し、「次へ」を押下
このタイミングで初回の方は、GitHub との連携設定を行う画面が表示されるかと思いますが、 画面に従い設定すればOKです。
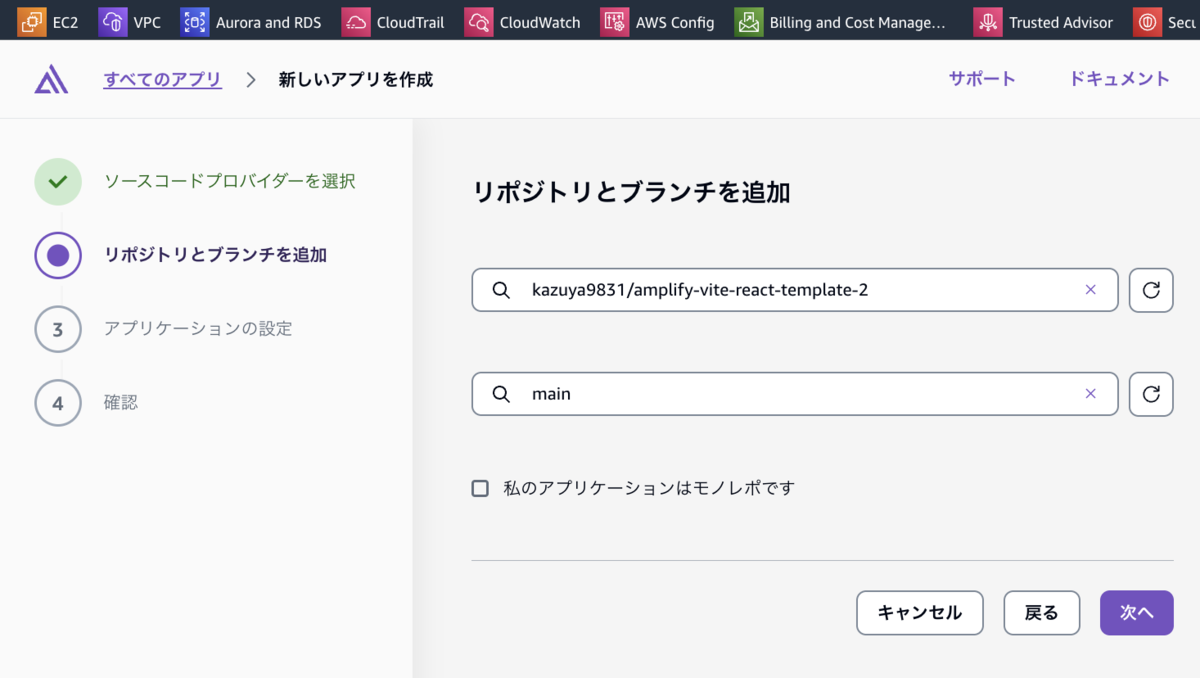
- 新しく作成したリポジトリとブランチ名を選択し、「次へ」を押下
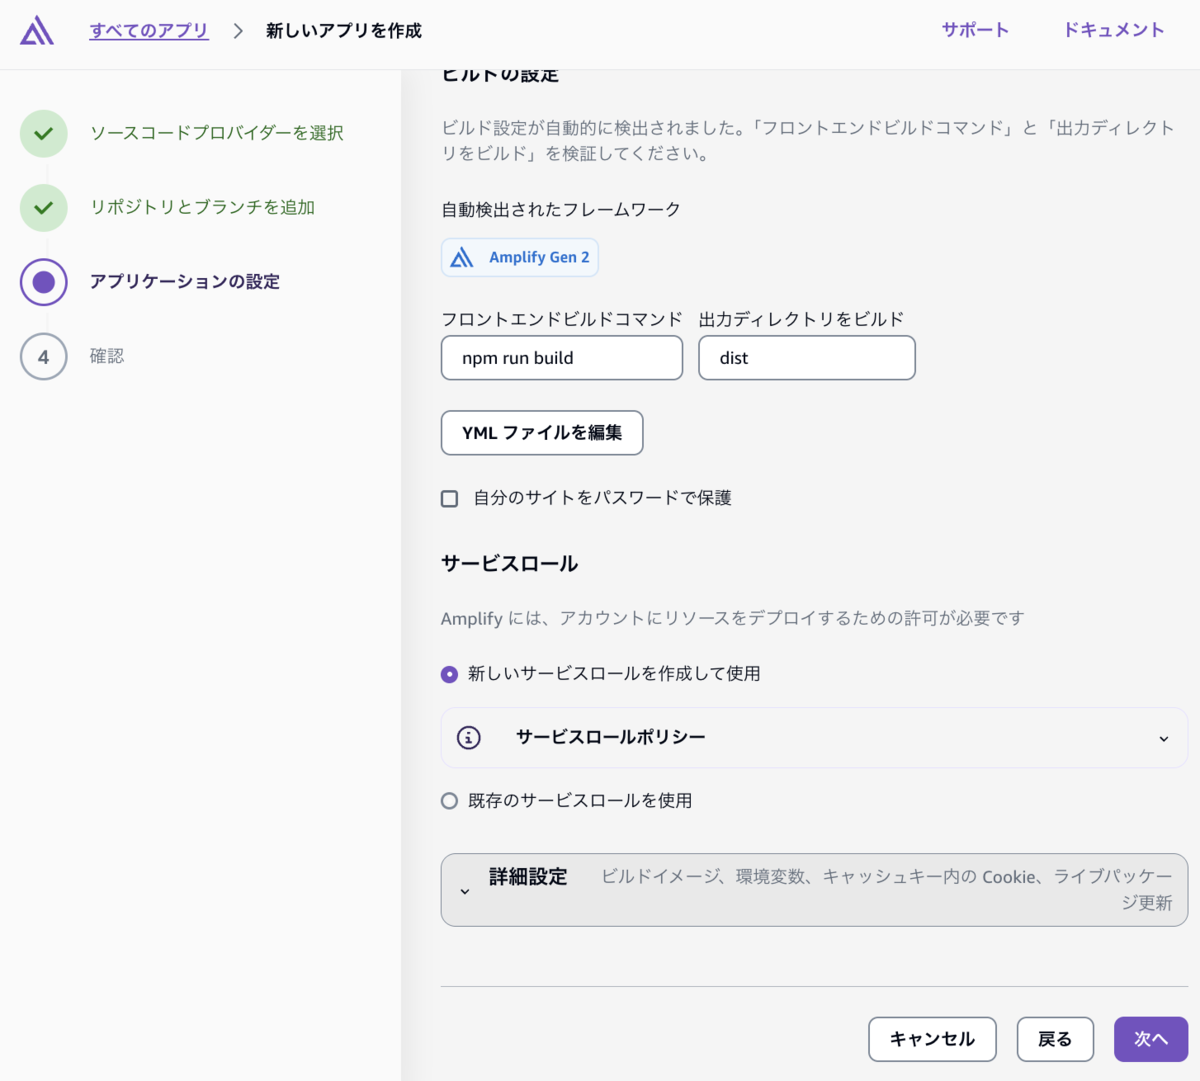
- デフォルトのまま、「次へ」を押下
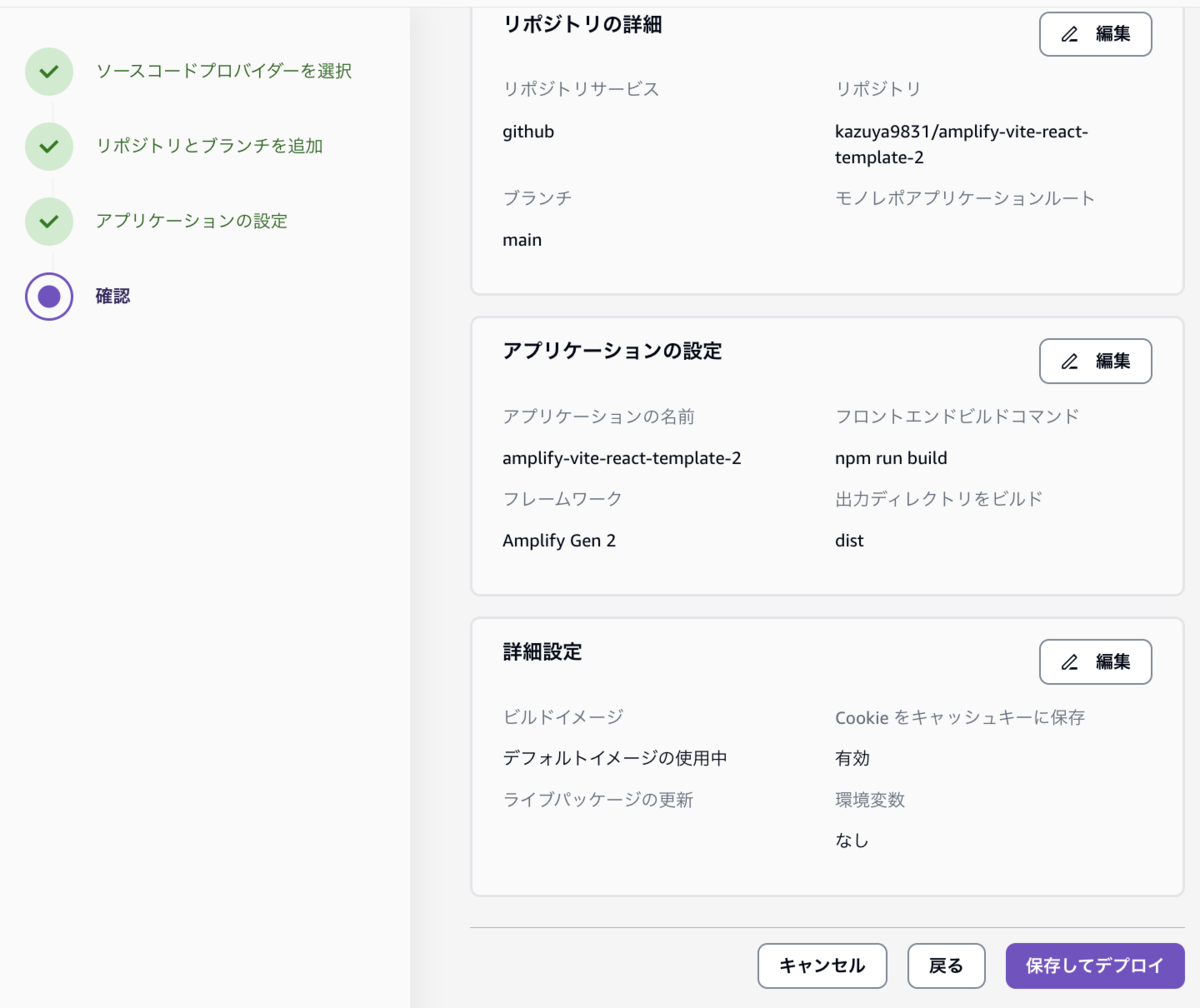
- デフォルトのまま、「保存してデプロイ」を押下
- デプロイが完了することを確認(6分30秒ほどかかりました)
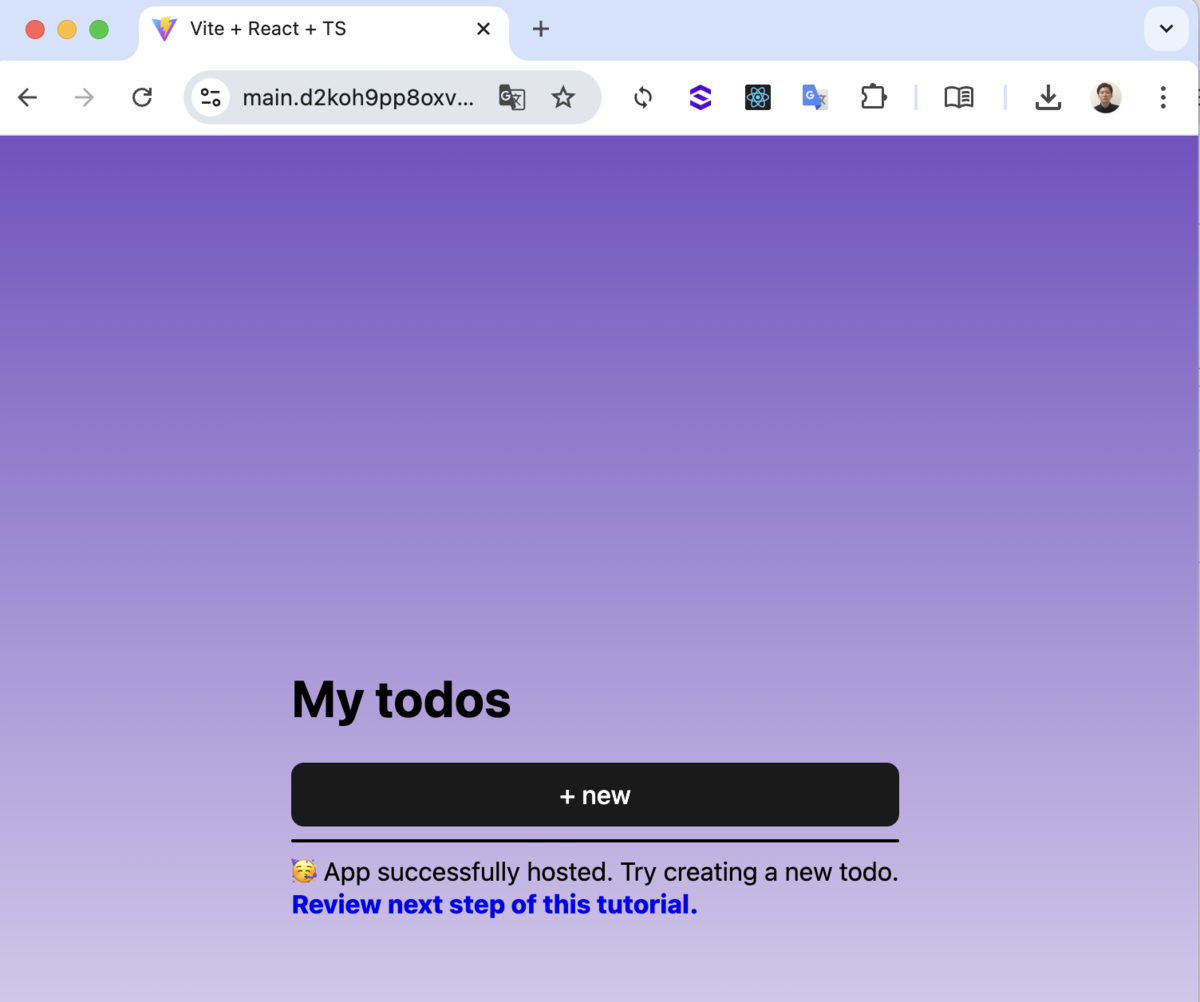
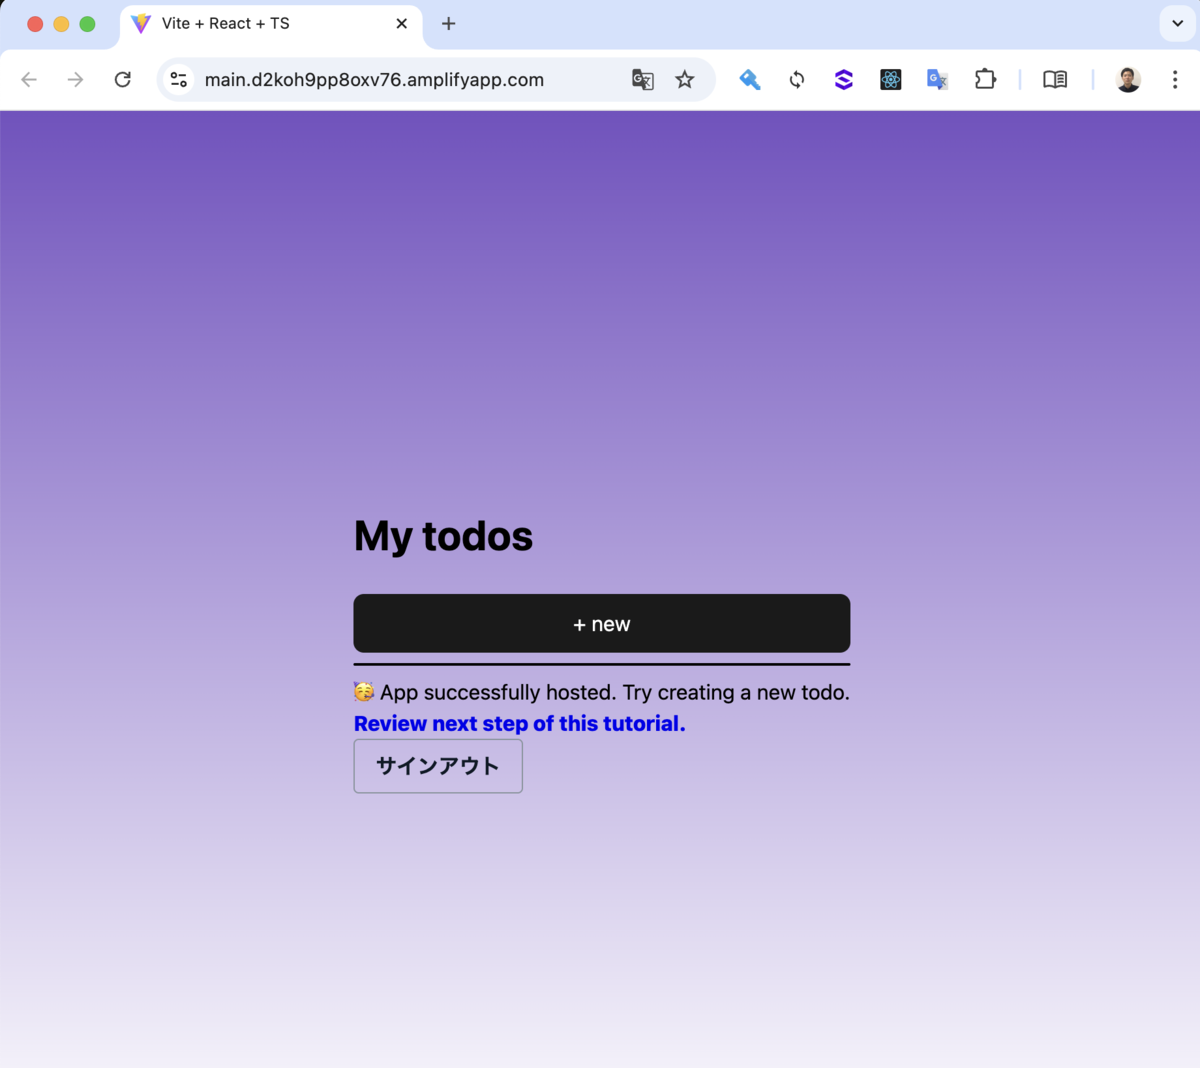
ドメイン名を押下すると、以下のように TODO アプリが表示されます
現時点では認証が入っていませんが、ここに認証を追加していきます
Cognito のログアウト及びコールバック URL の設定
- 新しく作成したリポジトリの Clone
git clone 【新しく作成したリポジトリのURL】
- デプロイされたリソースのドメイン名を確認
- amplify-vite-react-template/amplify/auth/resource.ts の9-12行目を追記
【ドメイン名】の箇所に前項で確認したドメイン名を入力します
import { defineAuth } from '@aws-amplify/backend';

/**
 * Define and configure your auth resource
 * @see https://docs.amplify.aws/gen2/build-a-backend/auth
 */
export const auth = defineAuth({
  loginWith: {
    email: true,
    externalProviders: { // 追記
      logoutUrls: ["【ドメイン名】"], // 追記
      callbackUrls: ["【ドメイン名】"], // 追記
    }, // 追記
  },
});
- 変更の適用
git add amplify/auth/resource.ts
git commit -m "update cognito"
git push
※GitHub のリポジトリの更新をトリガーに Amplify にて、デプロイが行われます
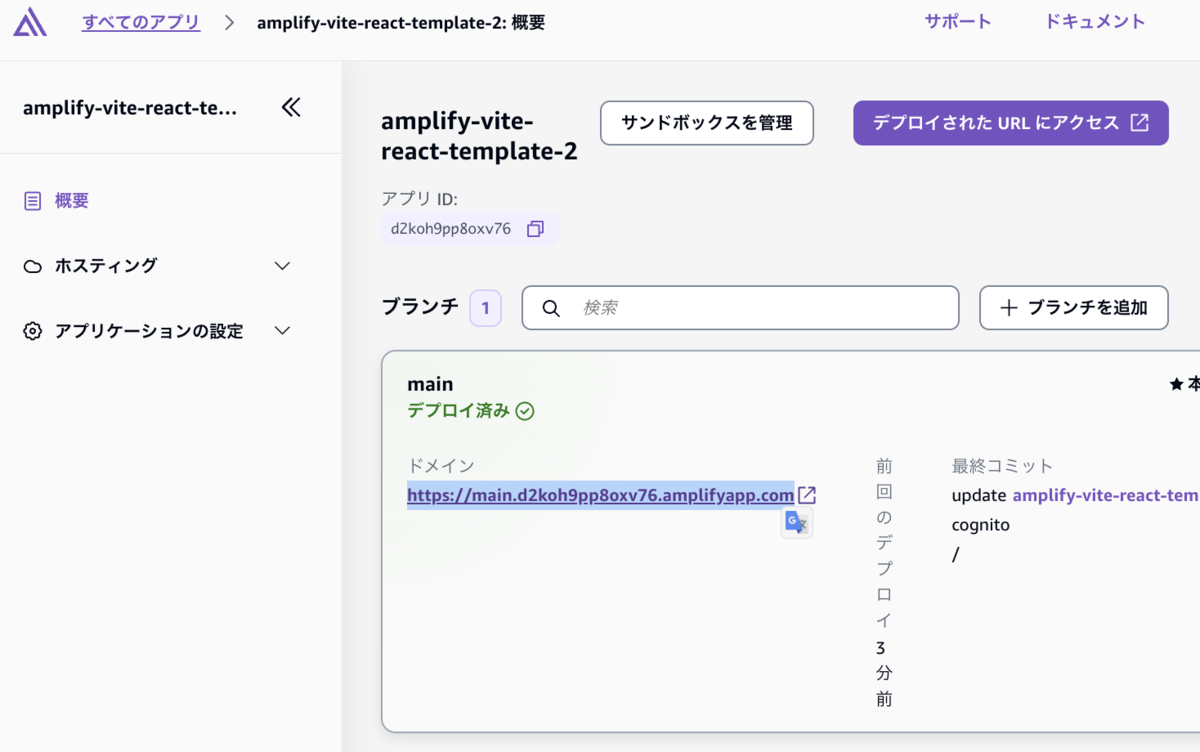
- Amplify からデプロイが完了することを確認し、ブランチ名(main)を押下
- 「デプロイされたバックエンドリソース」タブを選択し、「amplify_outputs.jsonをダウンロード」を押下
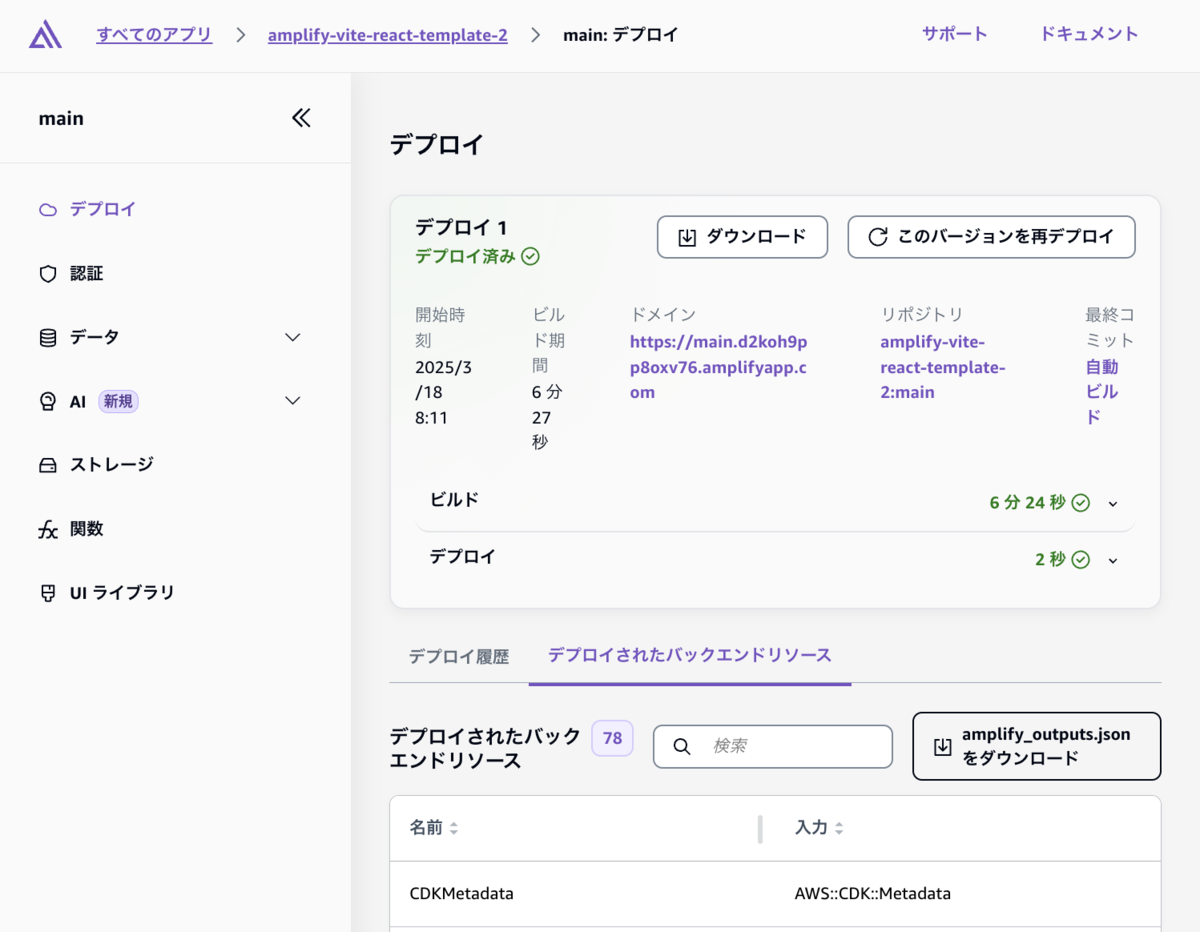
- amplify_outputs.json から EntraID の設定に必要な Cognito のユーザープール ID およびドメイン名を確認
cat amplify_outputs.json | jq '.auth | [.user_pool_id, .oauth.domain]'
実行結果例)
$ cat amplify_outputs.json | jq '.auth | [.user_pool_id, .oauth.domain]'
[
  "ap-northeast-1_5c4L37yyv",
  "235b1ea446b1ecf18b13.auth.ap-northeast-1.amazoncognito.com"
]
$
1番目の要素がCognito のユーザープール ID、2番目の要素がCognito のドメイン名になります。
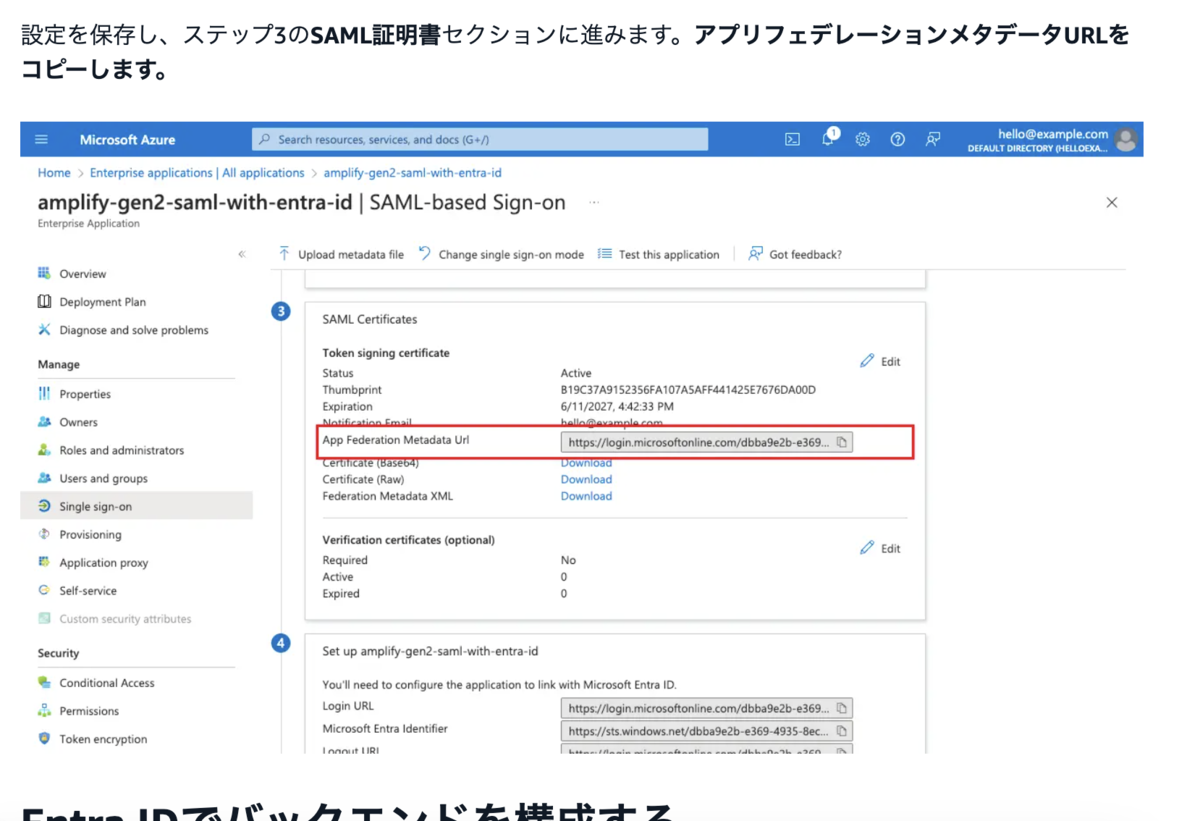
SAML 連携設定(EntraID)
- 以下ページの「Set up Microsoft Entra ID」の項目を実施
Microsoft Entra ID (SAML) - AWS Amplify Gen 2 Documentation
途中で実施する以下の項目には、前項で確認した値を入力します。
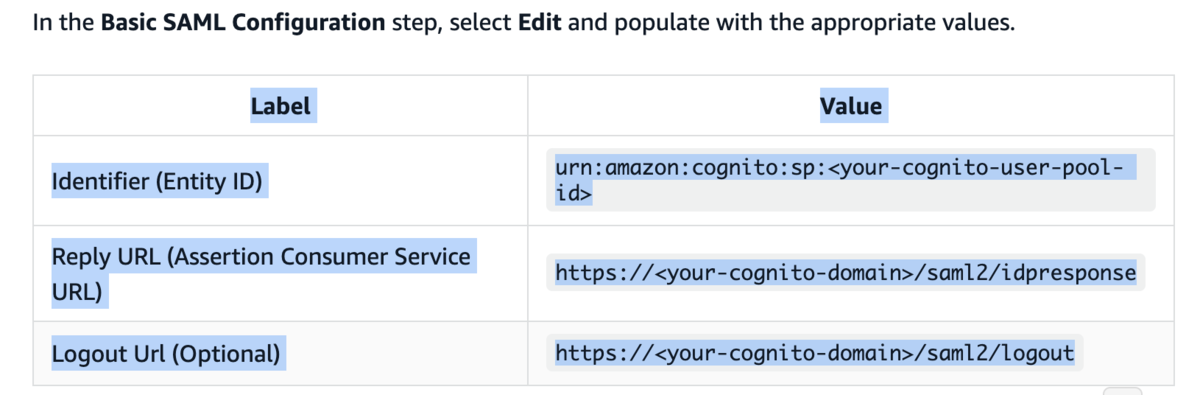
アプリフェデレーションメタデータ URL のコピーまで完了したら次項に進みます。
SAML 連携設定(Cognito)
- amplify-vite-react-template/amplify/auth/resource.ts の10-20行目を追記
【アプリフェデレーションメタデータ URL 】の部分には、前項でコピーした値を入力します。
import { defineAuth } from '@aws-amplify/backend';

/**
 * Define and configure your auth resource
 * @see https://docs.amplify.aws/gen2/build-a-backend/auth
 */
export const auth = defineAuth({
  loginWith: {
    email: true,
    externalProviders: {
      saml: { // 追記
        name: "MicrosoftEntraIDSAML", // 追記
        metadata: { // 追記
          metadataType: "URL", // 追記
          metadataContent: "【アプリフェデレーションメタデータ URL 】", // 追記
        }, // 追記
        attributeMapping: { // 追記
          email: "http://schemas.xmlsoap.org/ws/2005/05/identity/claims/emailaddress", // 追記
        }, // 追記
      }, // 追記
      logoutUrls: ["https://main.d2koh9pp8oxv76.amplifyapp.com"],
      callbackUrls: ["https://main.d2koh9pp8oxv76.amplifyapp.com"],
    },
  },
});
- 変更の適用
git add amplify/auth/resource.ts
git commit -m "update cognito 2"
git push
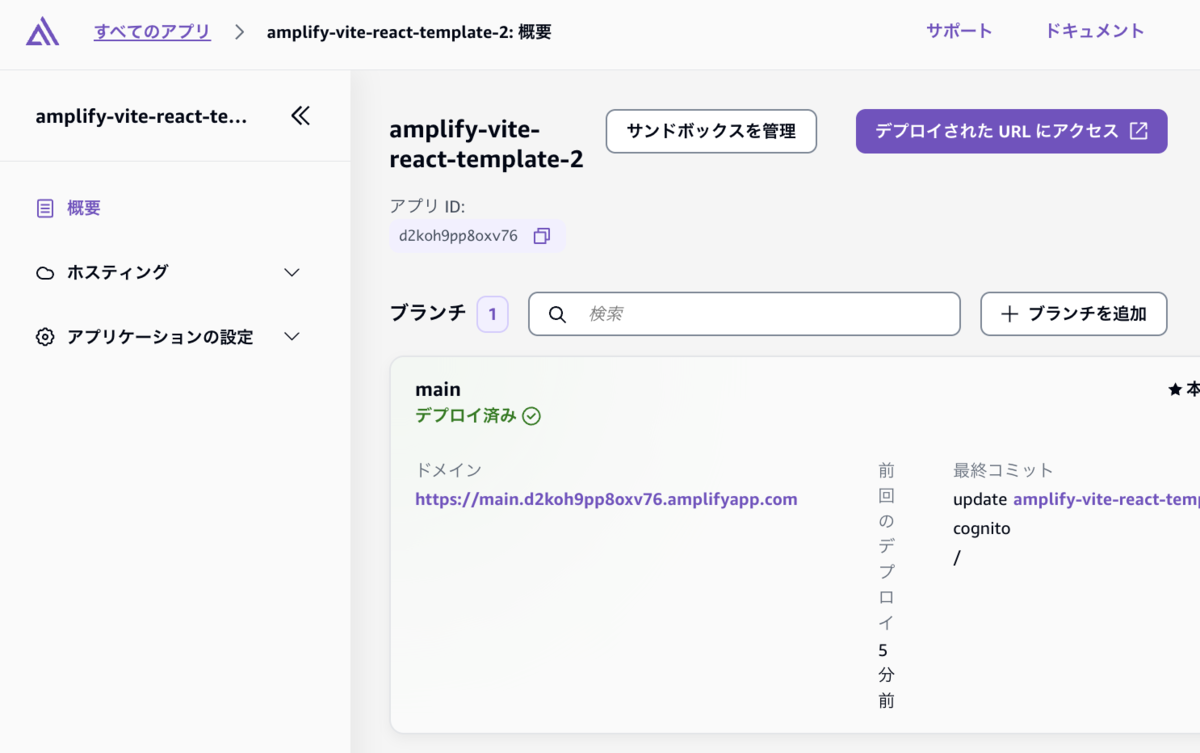
- デプロイが完了することを確認
オプション) EntraID への Cognito 署名証明書 のアップロード
検証をする上では、以下の設定は不要ですが、実際の運用を考慮する場合は、「Optionally upload the Cognito Signing Certificate」の設定をすることを検討しましょう。
Microsoft Entra ID (SAML) - AWS Amplify Gen 2 Documentation
フロントエンドの更新
- amplify-vite-react-template/amplify/src/main.tsx の7,11-13行目を追記
import React from "react";
import ReactDOM from "react-dom/client";
import App from "./App.tsx";
import "./index.css";
import { Amplify } from "aws-amplify";
import outputs from "../amplify_outputs.json";
import { signInWithRedirect } from "aws-amplify/auth" // 追記

Amplify.configure(outputs);

signInWithRedirect({ // 追記
  provider: { custom: "MicrosoftEntraIDSAML" } // 追記
}) // 追記

ReactDOM.createRoot(document.getElementById("root")!).render(
  <React.StrictMode>
    <App />
  </React.StrictMode>
);
- 変更の適用
git add src/main.tsx
git commit -m "update frontend"
git push
- デプロイが完了することを確認
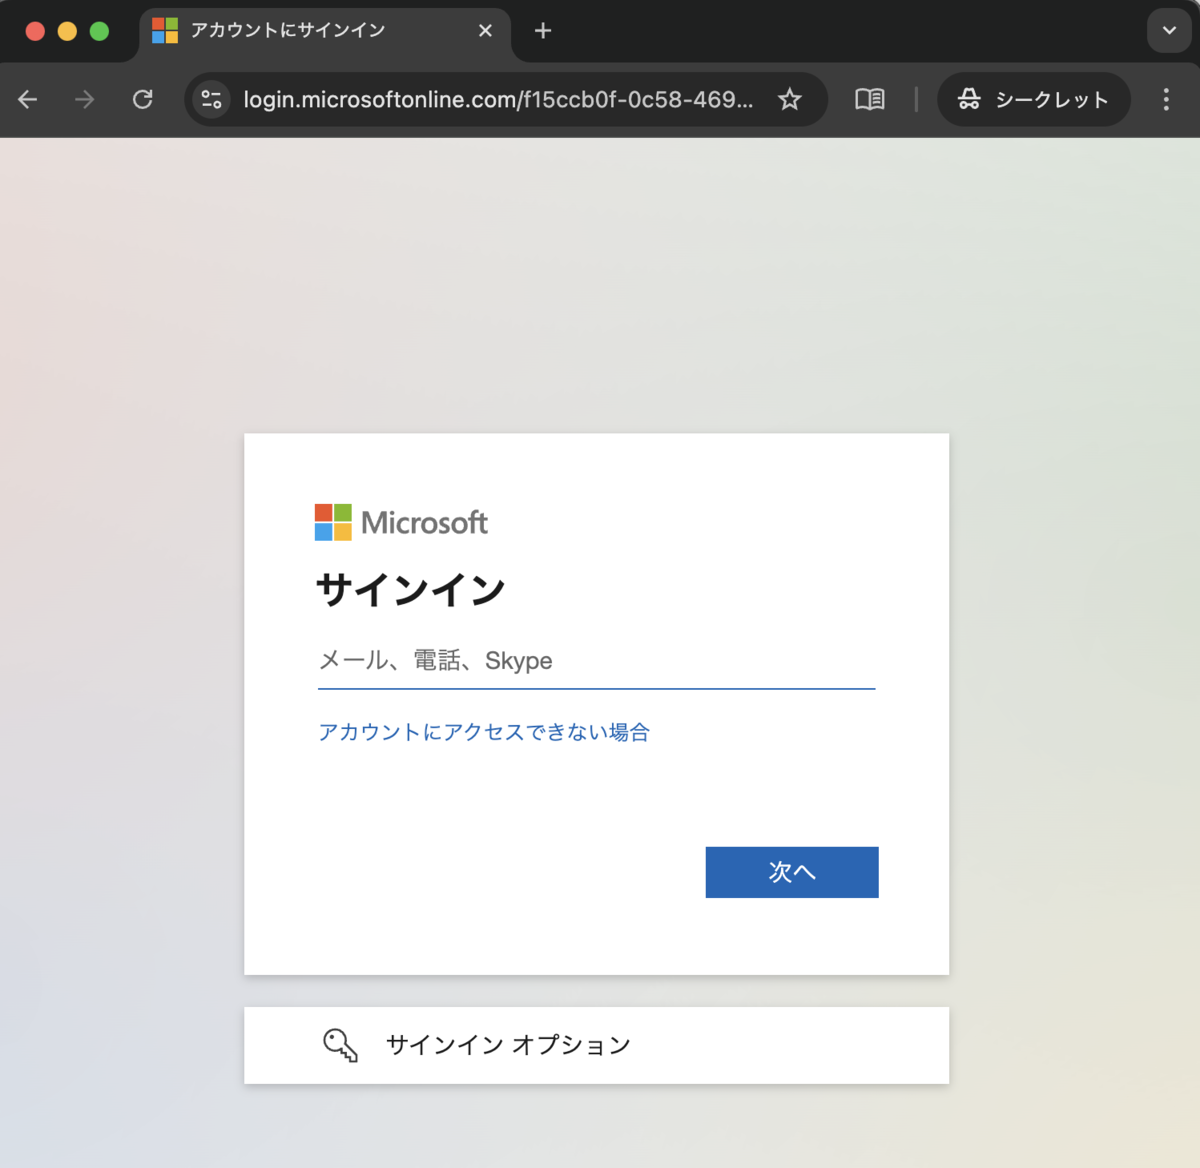
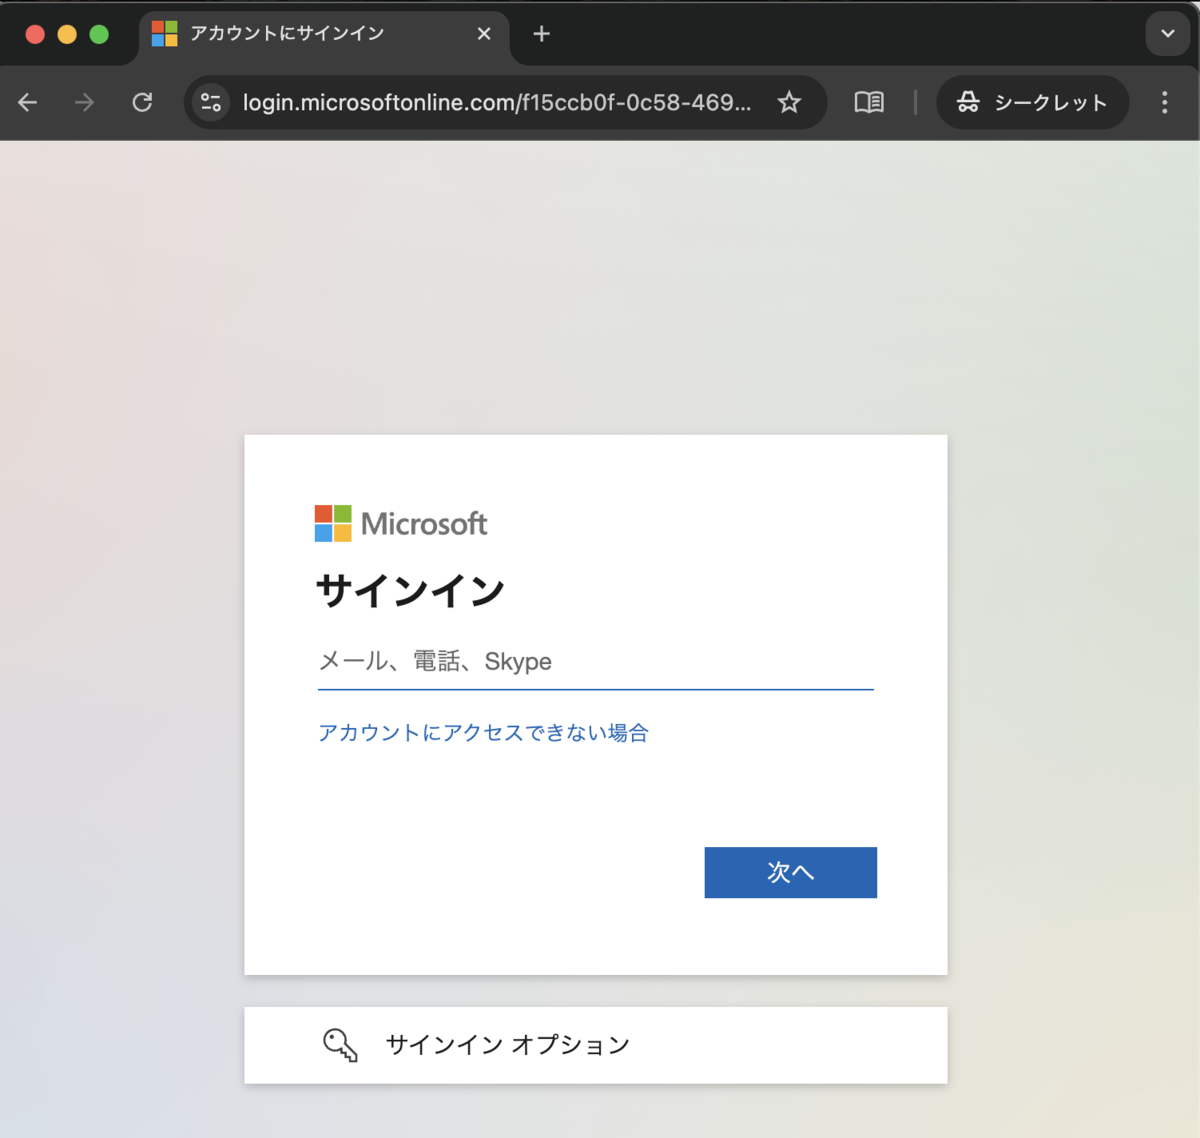
- ドメインにアクセスすると以下のように EntraID にリダイレクトされることを確認できます
Appendix) ログイン画面の作成
前項で気付いたかもしれませんが、EntraID の認証が入る前に一瞬フロントエンドの画面が表示されてしまいます。 そのため、確実にEntraID の認証が通ってからフロントエンドの画面が表示されるようにコードを更新します。
今回は、generative-ai-use-cases-jp(通称、GenU)と呼ばれるソリューションのコードを参考に実装します。
GitHub - aws-samples/generative-ai-use-cases-jp: すぐに業務活用できるビジネスユースケース集付きの安全な生成AIアプリ実装
- 補足
- 'amazon', 'apple', 'facebook', 'google' を利用している場合、Amplify の Authenticator コンポーネントを利用することで簡単に実装することができますが、SAML, OIDC は非サポートなため、独自でコンポーネントを作成します。
- https://ui.docs.amplify.aws/react/connected-components/authenticator/configuration#social-providers
- amplify-vite-react-template/amplify/src/components/AuthWithSAML.tsx を新規作成します。
import React, { useEffect, useState } from 'react';
import { Button, Text, Loader, useAuthenticator } from '@aws-amplify/ui-react';
import { Amplify } from 'aws-amplify';
import '@aws-amplify/ui-react/styles.css';
import { signInWithRedirect } from 'aws-amplify/auth';
import outputs from "../../amplify_outputs.json";

const cognitoUserPoolId: string = outputs.auth.user_pool_id;
const cognitoUserPoolCientId: string = outputs.auth.user_pool_client_id;
const cognitoIdentityPoolId: string = outputs.auth.identity_pool_id;
const samlCognitoDomainName: string = outputs.auth.oauth.domain;
const samlCognitoFederatedIdentityProviderName: string = "MicrosoftEntraIDSAML";

type Props = {
  children: React.ReactNode;
};

const AuthWithSAML: React.FC<Props> = (props) => {
  const { authStatus } = useAuthenticator((context) => [context.authStatus]);

  const [authenticated, setAuthenticated] = useState(false);
  const [loading, setLoading] = useState(true);

  useEffect(() => {
    // 認証状態の検証
    if (authStatus === 'configuring') {
      setLoading(true);
      setAuthenticated(false);
    } else if (authStatus === 'authenticated') {
      setLoading(false);
      setAuthenticated(true);
    } else {
      setLoading(false);
      setAuthenticated(false);
    }
  }, [authStatus]);

  const signIn = () => {
    signInWithRedirect({
      provider: {
        custom: samlCognitoFederatedIdentityProviderName,
      },
    });
  };

  Amplify.configure({
    Auth: {
      Cognito: {
        userPoolId: cognitoUserPoolId,
        userPoolClientId: cognitoUserPoolCientId,
        identityPoolId: cognitoIdentityPoolId,
        loginWith: {
          oauth: {
            domain: samlCognitoDomainName, // cdk.json の値を指定
            scopes: ['openid', 'email', 'profile'],
            // CloudFront で展開している Web ページを動的に取得
            redirectSignIn: [window.location.origin],
            redirectSignOut: [window.location.origin],
            responseType: 'code',
          },
        },
      },
    },
  });

  return (
    <>
      {loading ? (
        <div className="grid grid-cols-1 justify-items-center gap-4">
          <Text className="mt-12 text-center">Loading...</Text>
          <Loader width="5rem" height="5rem" />
        </div>
      ) : !authenticated ? (
        <div className="grid grid-cols-1 justify-items-center gap-4">
          <Text className="mt-12 text-center text-3xl">
            Todo App
          </Text>
          <Button
            variation="primary"
            onClick={() => signIn()}
            className="mt-6 w-60">
            ログイン
          </Button>
        </div>
      ) : (
        <>{props.children}</>
      )}
    </>
  );
};

export default AuthWithSAML;
- amplify-vite-react-template/src/main.tsx の更新
★の箇所のコメントは記載したままだとUIに表示されてしまうため、削除してください。
import React from "react";
import ReactDOM from "react-dom/client";
import App from "./App.tsx";
import "./index.css";
import { Amplify } from "aws-amplify";
import outputs from "../amplify_outputs.json";
// import { signInWithRedirect } from "aws-amplify/auth" // コメントアウト
import AuthWithSAML from "./components/AuthWithSAML.tsx"; // 追記
import { Authenticator } from '@aws-amplify/ui-react'; // 追記


Amplify.configure(outputs);

// signInWithRedirect({ // コメントアウト
//   provider: { custom: "MicrosoftEntraIDSAML" }  // コメントアウト
// })  // コメントアウト

ReactDOM.createRoot(document.getElementById("root")!).render(
  <React.StrictMode>
    <Authenticator.Provider> // 追記(★)
      <AuthWithSAML> // 追記(★)
        <App />
      </AuthWithSAML> // 追記(★)
    </Authenticator.Provider> // 追記(★)
  </React.StrictMode>
);
- 変更の適用
git add src/main.tsx src/components
git commit -m "update Authenticator"
git push
- デプロイが完了することを確認
- デプロイ完了後、ドメインにアクセスすると以下の画面が表示されるため、「ログイン」を押下
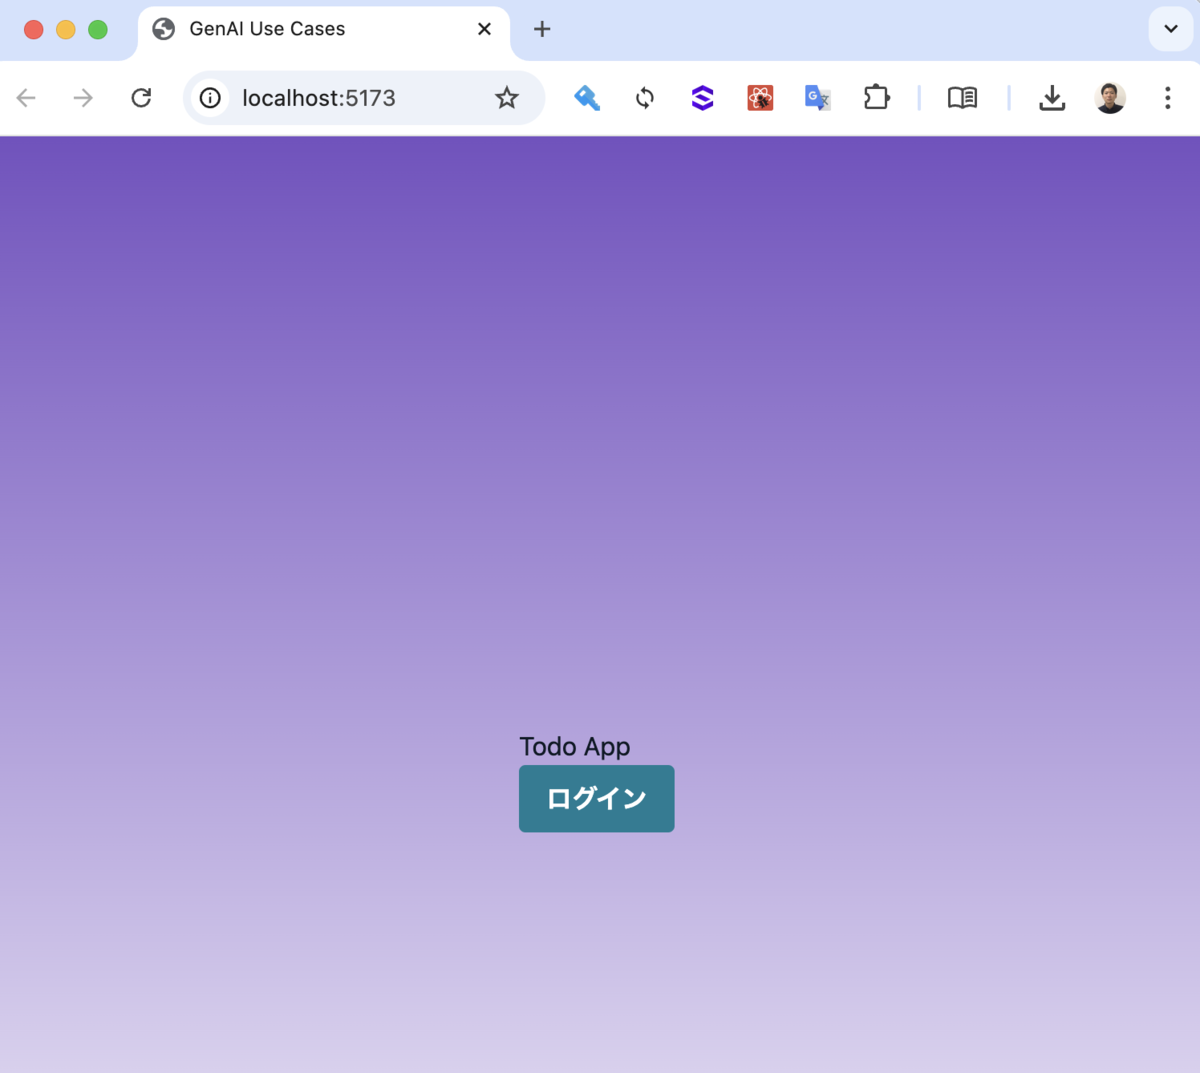
- 「ログイン」ボタンを押下すると、EntraID にリダイレクトされます
Appendix) ログアウト画面の作成
- swr のインストール
npm insstall swr
- amplify-vite-react-template/src/components/SignOut.tsx の作成
import { useAuthenticator, Button } from '@aws-amplify/ui-react';
import { useCallback } from 'react';
import { useSWRConfig } from 'swr';

const SignOut = () => {
  const { cache } = useSWRConfig();
  const { signOut } = useAuthenticator();

  const onClickSignout = useCallback(() => {
    // SWRのキャッシュを全て削除する
    for (const key of cache.keys()) {
      cache.delete(key);
    }
    signOut();
  }, [cache, signOut]);

  return (
    <div>
      <div className="my-10 flex w-full justify-center">
        <Button onClick={onClickSignout} className="text-lg">
          サインアウト
        </Button>
      </div>
    </div>
  );
};

export default SignOut;
- amplify-vite-react-template/amplify/src/main.tsx の9,18行目を追記
★の箇所のコメントは記載したままだとUIに表示されてしまうため、削除してください。
import React from "react";
import ReactDOM from "react-dom/client";
import App from "./App.tsx";
import "./index.css";
import { Amplify } from "aws-amplify";
import outputs from "../amplify_outputs.json";
import AuthWithSAML from "./components/AuthWithSAML.tsx";
import { Authenticator } from '@aws-amplify/ui-react';
import SignOut from "./components/SignOut.tsx"; // 追記

Amplify.configure(outputs);

ReactDOM.createRoot(document.getElementById("root")!).render(
  <React.StrictMode>
    <Authenticator.Provider>
      <AuthWithSAML>
        <App />
        <SignOut /> // 追記(★)
      </AuthWithSAML>
    </Authenticator.Provider>
  </React.StrictMode>
);
- デプロイが完了することを確認
- デプロイ完了後、ドメインにアクセスし、ログインします。
- ログイン完了後、「サインアウト」ボタンを押下します。
- サインアウトされることを確認すればOKです。
終わりに
今回は、AWS Amplify を利用する場合の Cognito と EntraID の SAML 連携設定および GenU をベースにしたログイン、ログアウト画面を作成する方法をご紹介いたしました。
どなたかのお役に立てれば幸いです。