はじめに
こんにちは、技術一課の山中です。
先日の re:Invent 2018 にて以下ワークショップに参加したのですが、その内容が面白く簡単だったのでこちらでご紹介いたします。
BAP401-R - [REPEAT] Build a Voice-Based Chatbot for Your Amazon Connect Contact Center
注意としては、ワークショップ一本分をひとつのブログにしているので正直、 長いです。
できあがるもの
本ブログを通してできあがるものは以下のとおりです。
私:(電話かける)

ボット:「Hi Daishi Yamanaka, Welcome to the IT help desk」

ボット:「How can I help?」

私:「I can't access the internet」

ボット:「Please try to access to the internet once more.」
電話でボットと会話をしながらパスワードのリセット等ユーザへのサポートを提供することができます。
作成の流れ
音声ベースのチャットボット作成の流れは以下のようになります。
- Connect インスタンスの作成
- 電話番号取得
- チャットボットの作成
- Lex を利用したワークフロー作成
- ワークフローを電話番号へ関連付け
- ユーザデータへアクセスするための Lambda ファンクション作成
- ワークフローに Lambda ファンクションを追加
流れを見ると大変そうに見えますが、一つ一つの処理は大したことはないので、早速やっていきましょう。
Connect インスタンスの作成
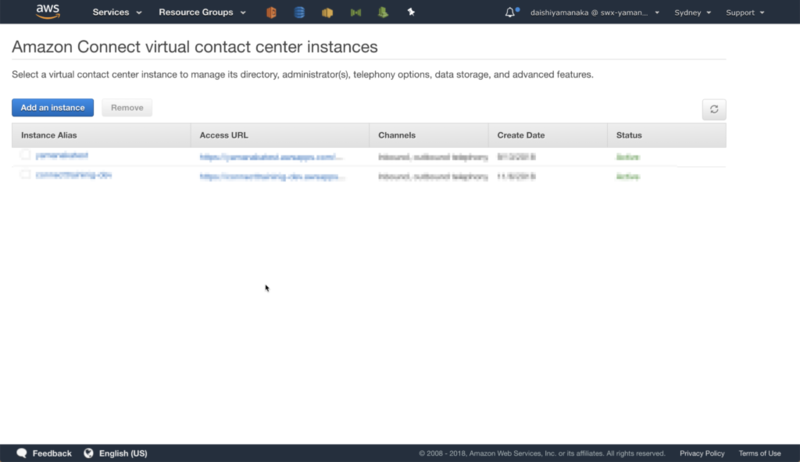
- Amazon Connect から [Add an instance] ボタンをクリックします。今回は日本の電話番号を取得するために、シドニーリージョンにて進めていきます。
- Access URL に任意の文字列を入力し、 [Next step] ボタンをクリックします。

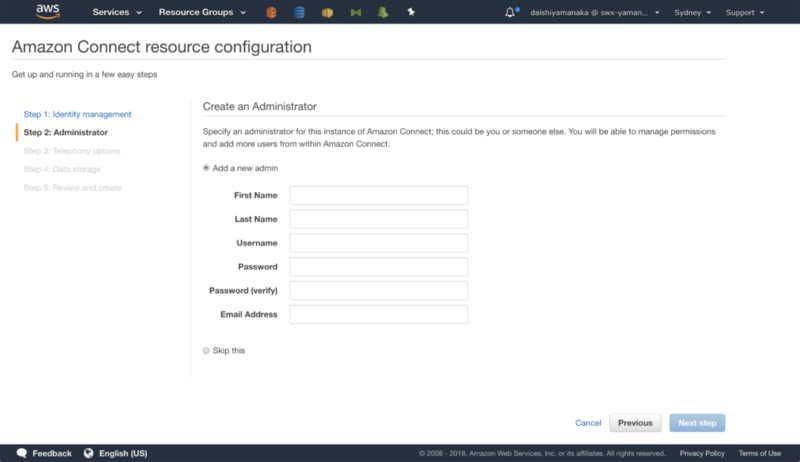
- 管理者用ユーザの情報を入力して、 [Next step] ボタンをクリックします。
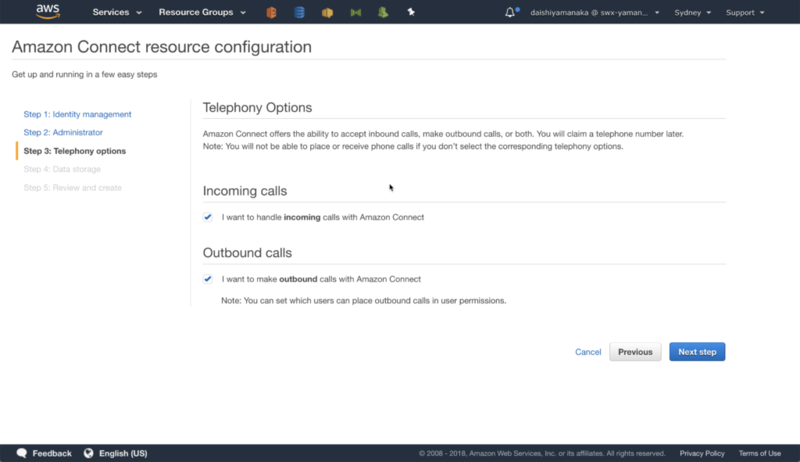
- そのまま [Next step] ボタンをクリックします。
- そのまま [Next step] ボタンをクリックします。

- 内容を確認したら [Create instance] ボタンをクリックします。

- これでインスタンスの作成は終了です。(ここで Connect が Safari に対応していなかったことを思い出して Chrome に切り替えました。。
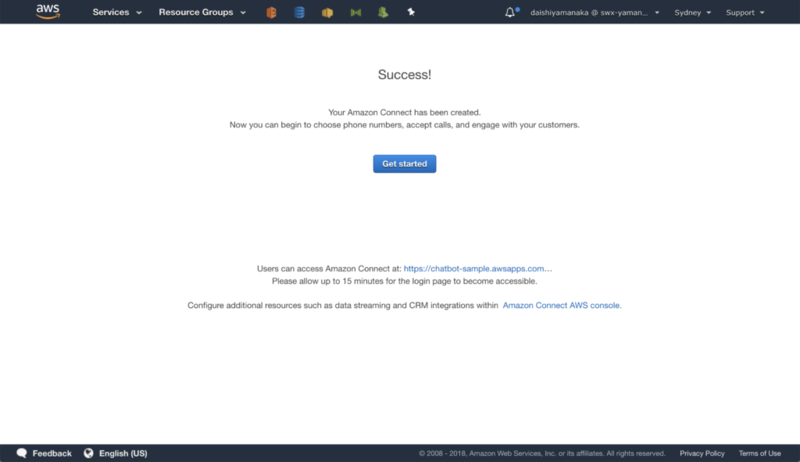
[Get started] ボタンをクリックした際に、 CloudFront の 403 エラーがでることがありますが、その際は時間を置いてアクセスしてみてください。
電話番号の取得
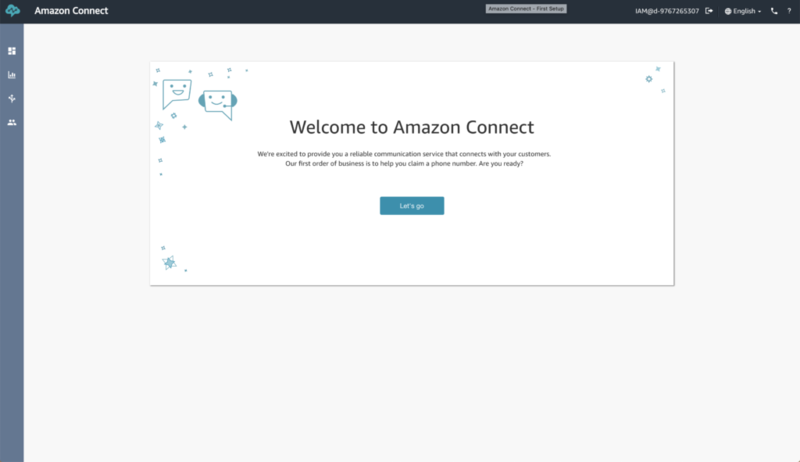
- [Get started] ボタンをクリックすると以下画面が表示されるので、 [Let’s go] ボタンをクリックします。
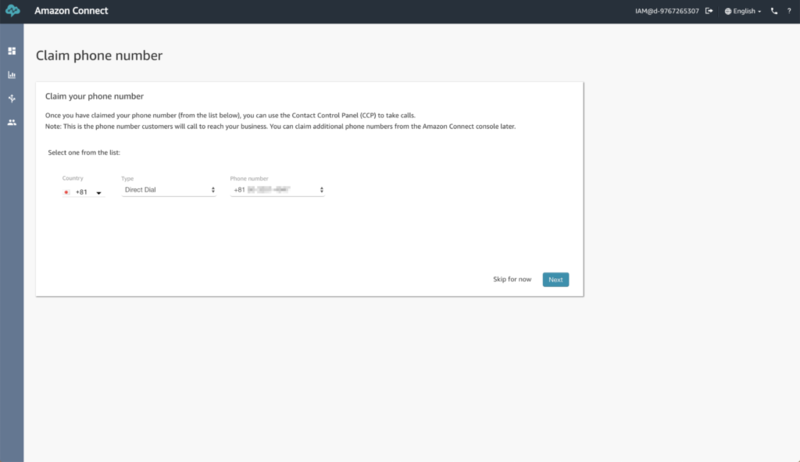
- 電話番号取得画面が表示されるので、 Country で
Japanを選択し [Next] ボタンをクリックします。ランダムに日本の電話番号が取得できます。
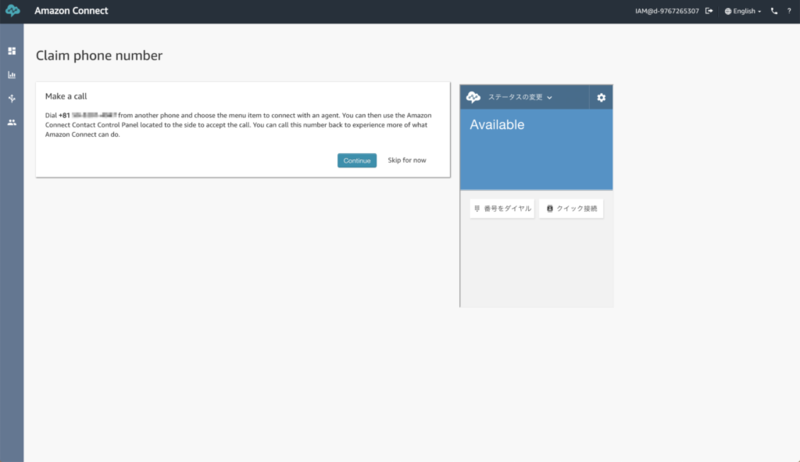
- 発行された電話番号に電話を掛けてみて、問題なくつながったら [Continue] ボタンをクリックします。
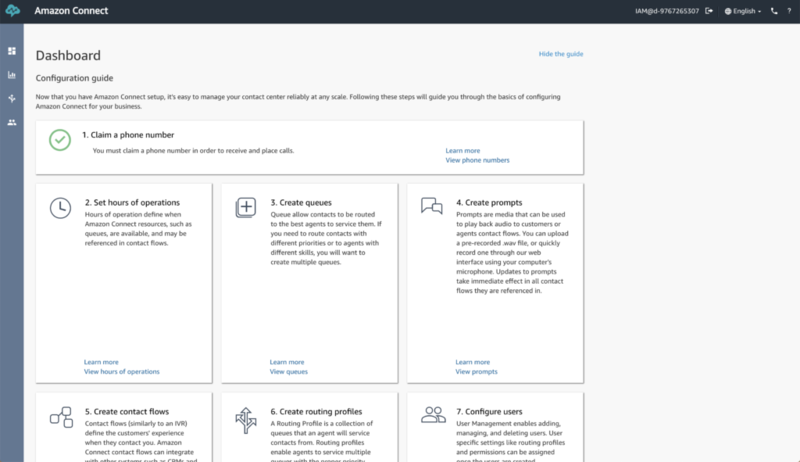
- これにて電話番号の取得は完了です。
チャットボットの作成
続いて Lex にてチャットボットの作成を進めていきます。
ただし、 Amazon Lex は残念ながらシドニーリージョンではまだ利用できないため、バージニアリージョンにて作成していきます。
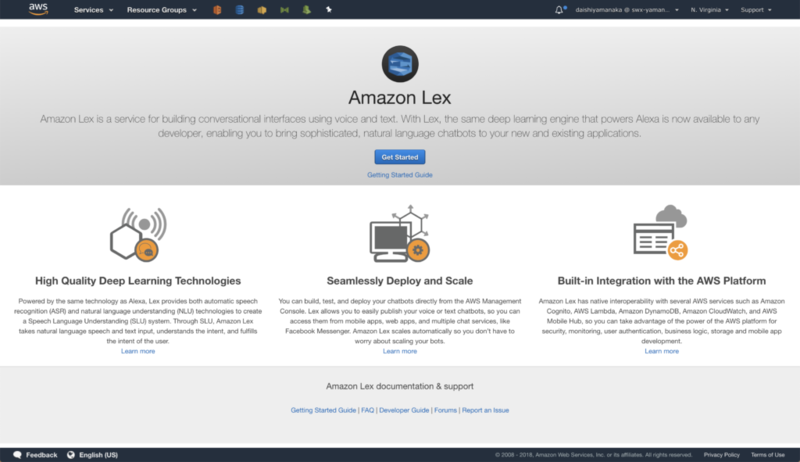
- Amazon Lex から [Get Started] ボタンをクリックします。
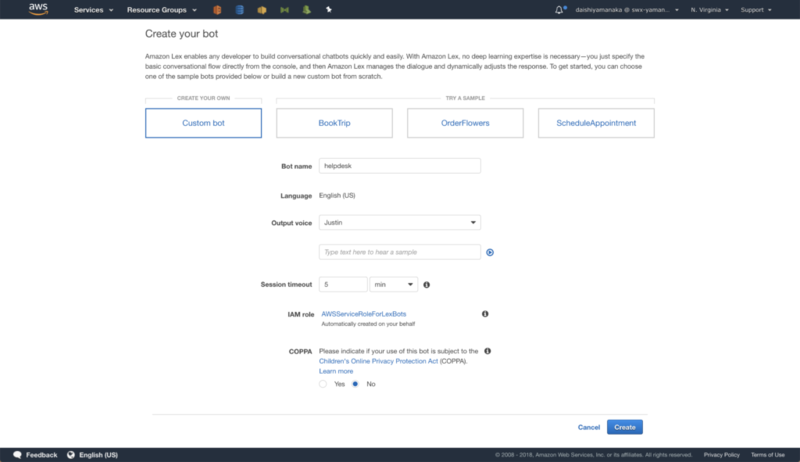
- [Custom bot] を選択して、ボットの名前と声の種類を選んでください。残念ながら現状、言語は英語しか対応していません…
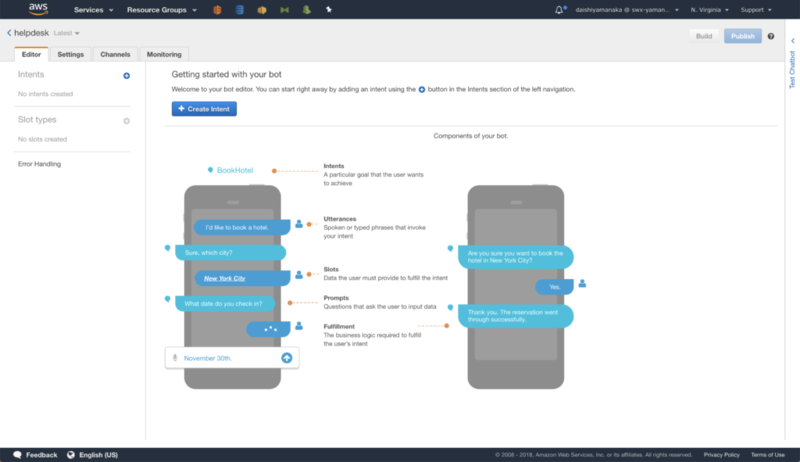
- 作成が完了すると以下のような画面が表示されるので、 [Create Intent] ボタンをクリックして、インテントを作成していきます。
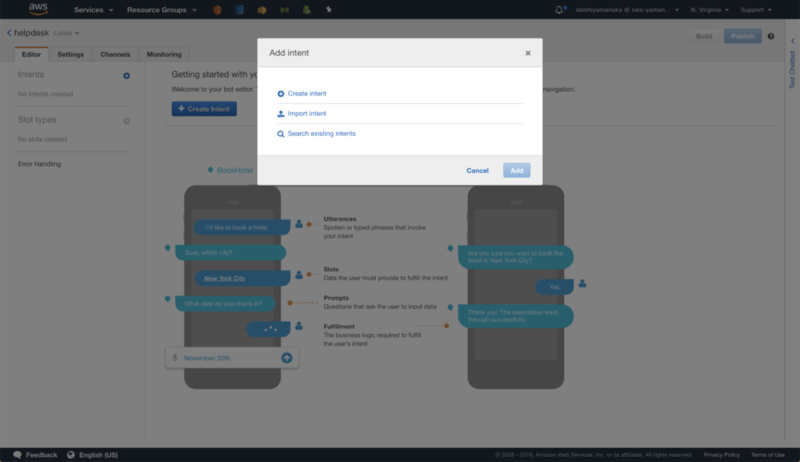
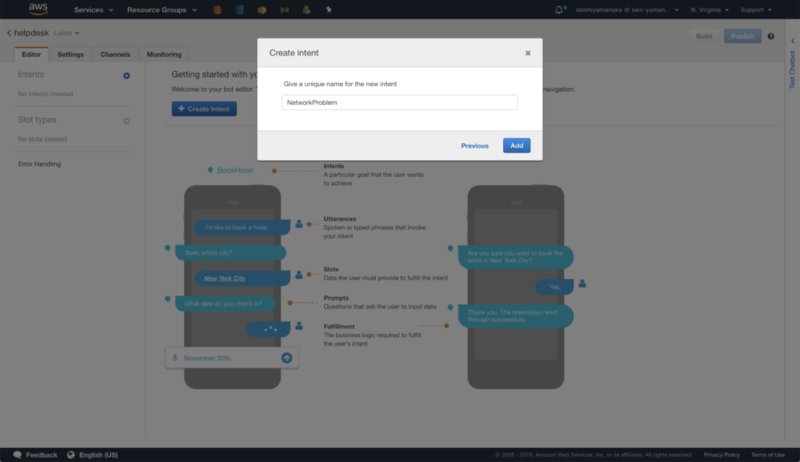
- 今回は新規に作成していくので、 [Create intent] を選択。
NetworkProblemと入力して、 [Add] ボタンをクリックします。
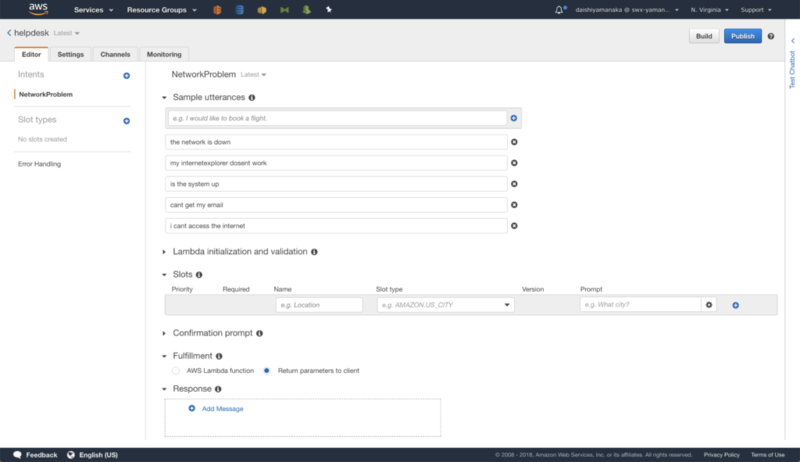
- Sample utterances にユーザが言いそうな内容を予め登録しておきます。(utterances って発生とか発話とかの意味なんですね、知らなかった
入力が終わったら、下部の [Save Intent] ボタンをクリックして保存します。
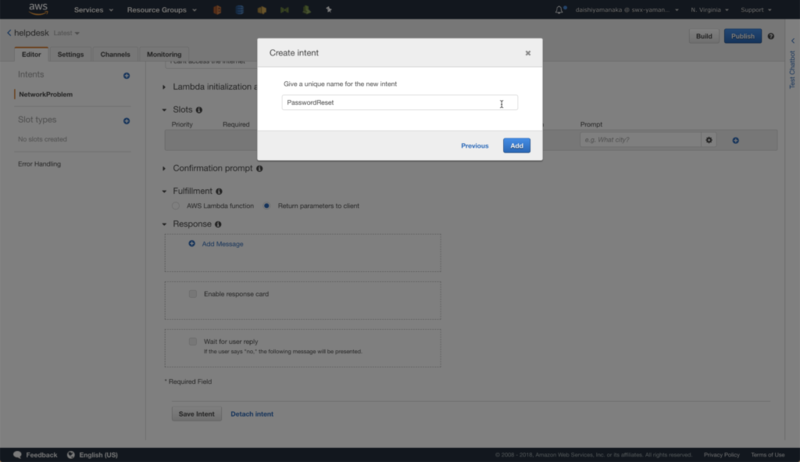
- パスワード初期化用の Intent をもう一つ追加していきます。
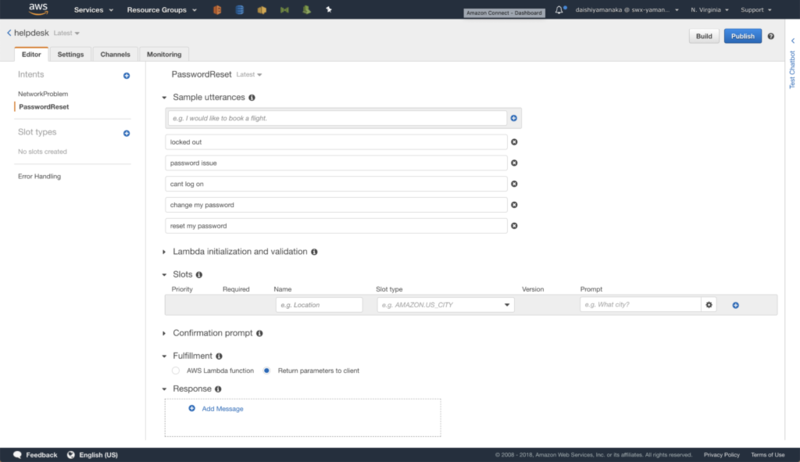
- NetworkProblem の時と同様、 Sample utterances を埋めていきます。
- Slots に
AccountIDを追加します。
AccountID として番号が入ることを想定しているので、 Slot type に AMAZON.NUMBER を選択しています。
Prompt にはスロットを埋めるための質問文を入力します。
入力が終わったら、保存します。
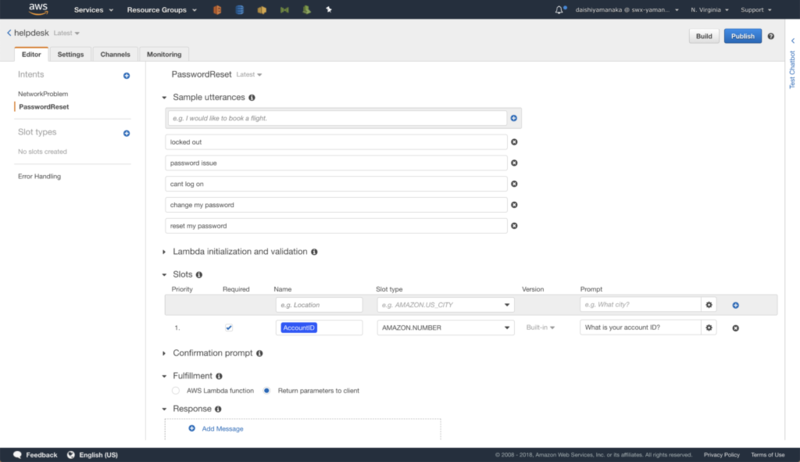
- 保存ができたら、 [Build] ボタンをクリックします。
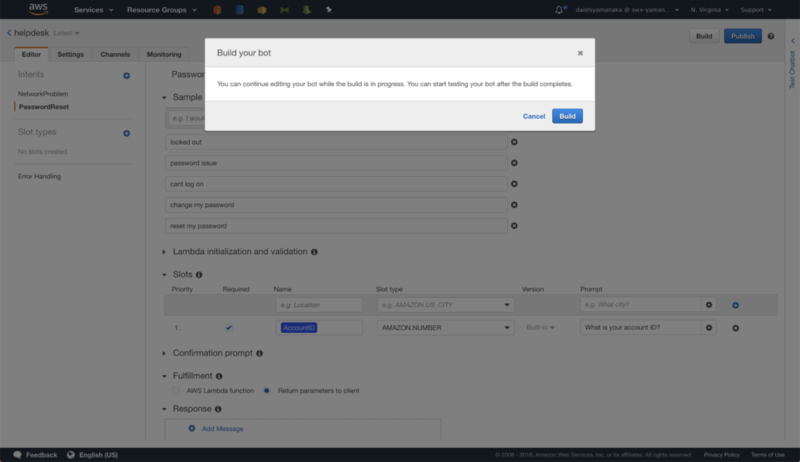
確認画面がでるので [Build] ボタンをクリックします。
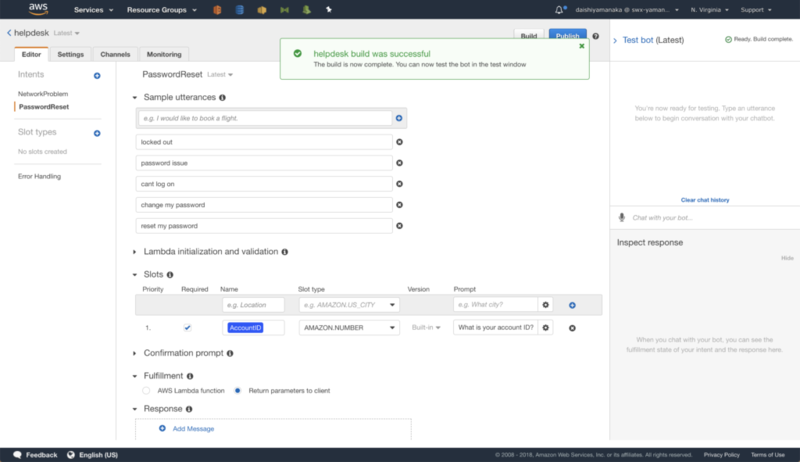
- 以下ポップアップが表示されたらビルド成功です!
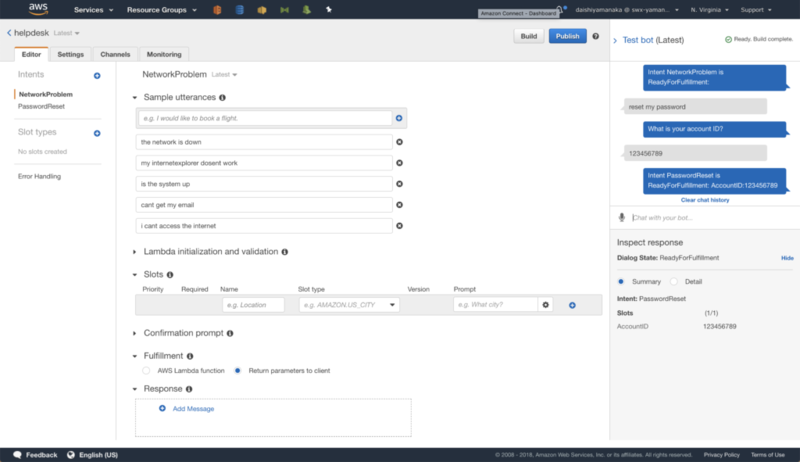
- ビルドが成功したら右側でテストができるので以下のようにテストしてみましょう。
- テストが問題なさそうであれば [Publish] ボタンをクリックします。
Alias の指定画面がでてくるので prd を入力して [Publish] ボタンをクリックします。
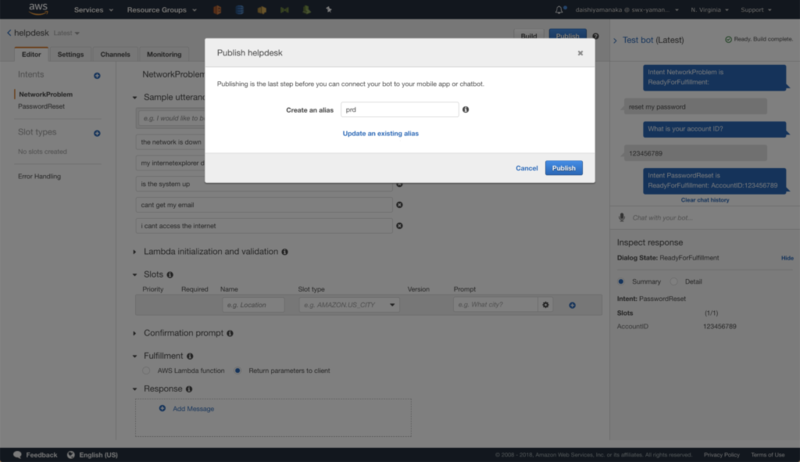
- これにてチャットボットの作成は完了です。
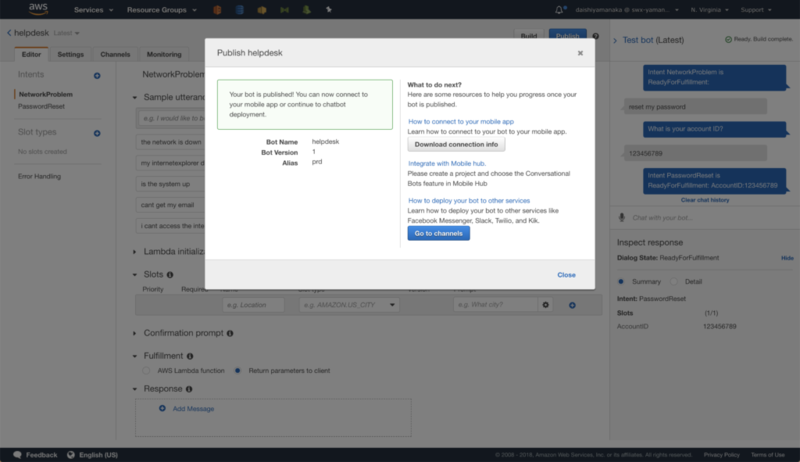
Lex を利用したワークフロー作成
作成したチャットボットを Amazon Connect に適用していきます。
- Amazon Connect の Instance Alias を選択します。

- 左ペインから [Contact flows] を選択し、作成したチャットボットを追加します。
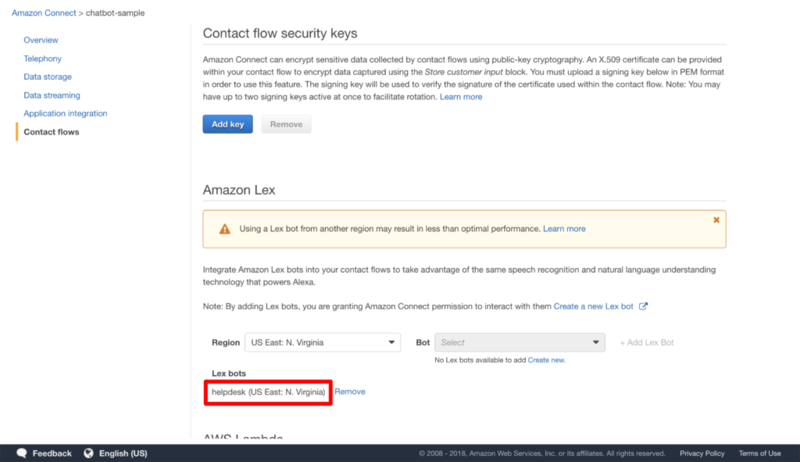
- 左ペインから [Overview] を選択、 Login URL にアクセスしログインします。

- 左ペインから [Contact flows] を選択し、以下画面に [Create contact flow] ボタンをクリックします。
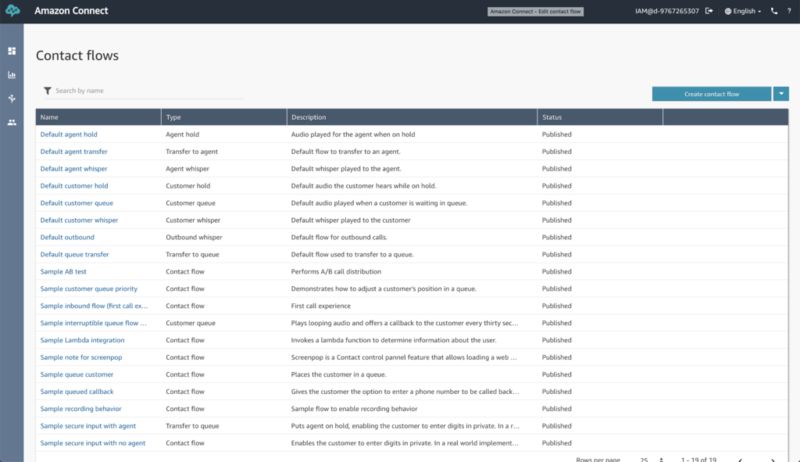
- まずは Name に
ItHelpDesk(任意)を入力します。

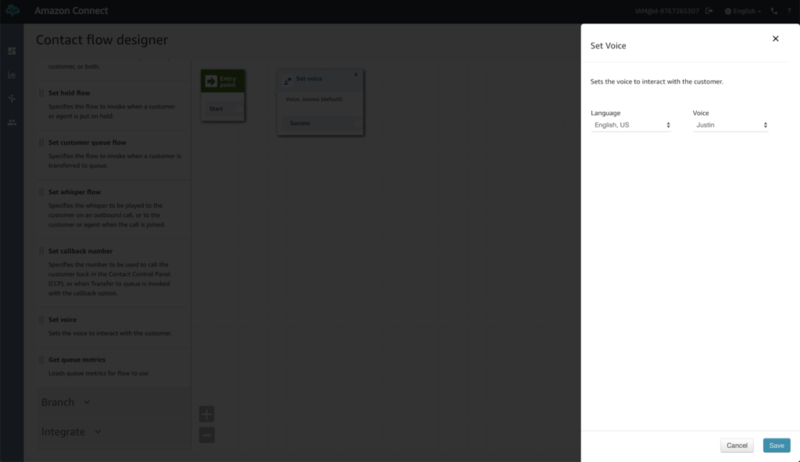
- 声の設定
電話の声を設定していきます。 今回チャットボットが英語なので英語を設定しましょう。声は Justin を選びました。
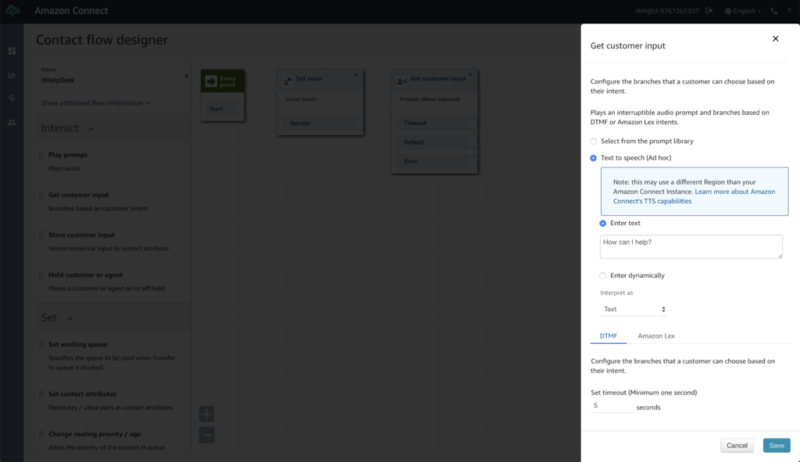
- 電話を掛けてきた相手に対する始めの文言を設定します。
Text to speech を選択し、 How can I help? と入力します。
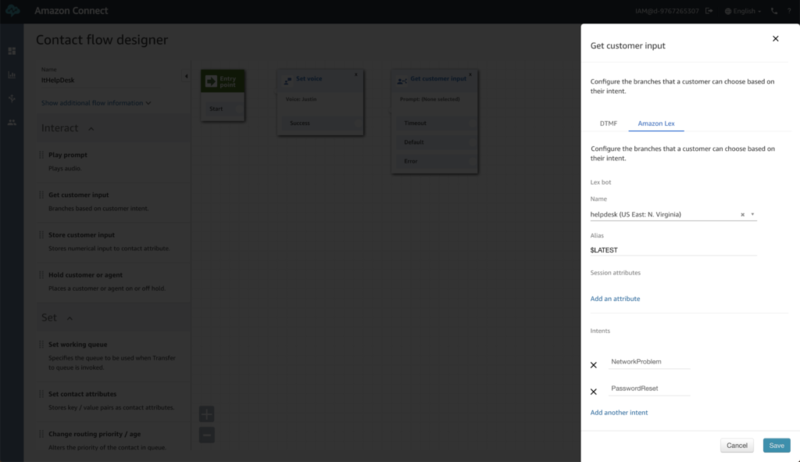
- 更に、 Amazon Lex タブを選択後、作成したチャットボットを選択し、該当のインテントを追加します。
- 保存するとこのようになります。

- 次に Play prompt を縦に 3 つ並べます。(料理番組みたい
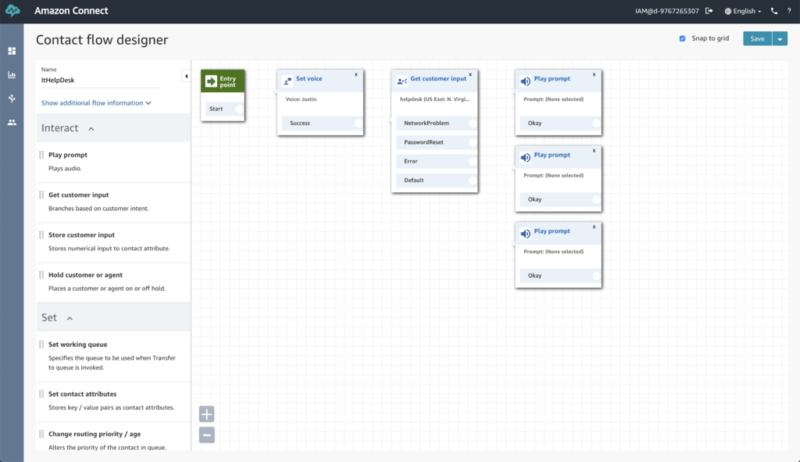
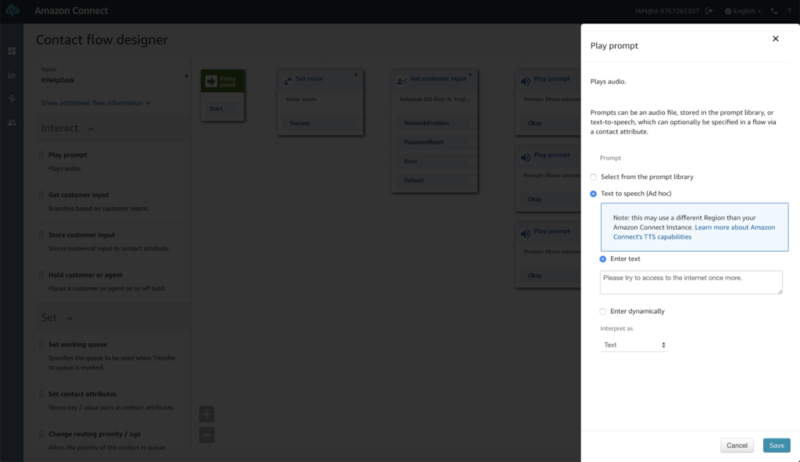
- 一番上の prompt を選択し、
NetworkProblem時の返答文言を入力し保存します。
- 同様に 上から二番目の prompt を選択し、
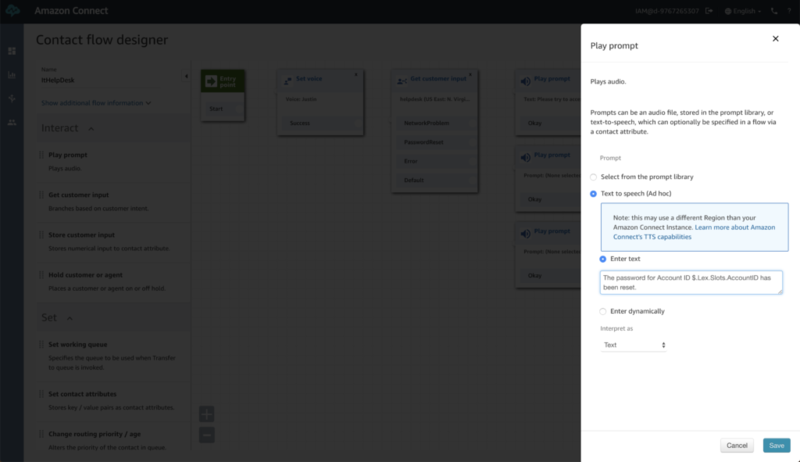
PasswordReset時の返答文言を入力し保存します。
$.Lex.Slots.AccountID でスロットに存在する AccountID を動的に取得することができます。
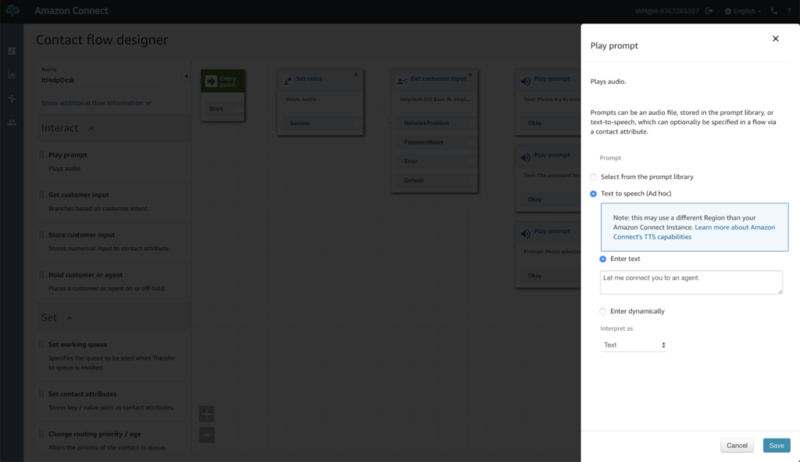
- 上から三番目の prompt を選択し、想定外の発話がされた場合やエラーが発生した場合の返答文言を入力し保存します。
今回はエージェントに転送する旨の文言を設定しました。
- 電話を切断するための Disconnect / hang up と異なるキューにまわすための Transfer to queue を追加します。
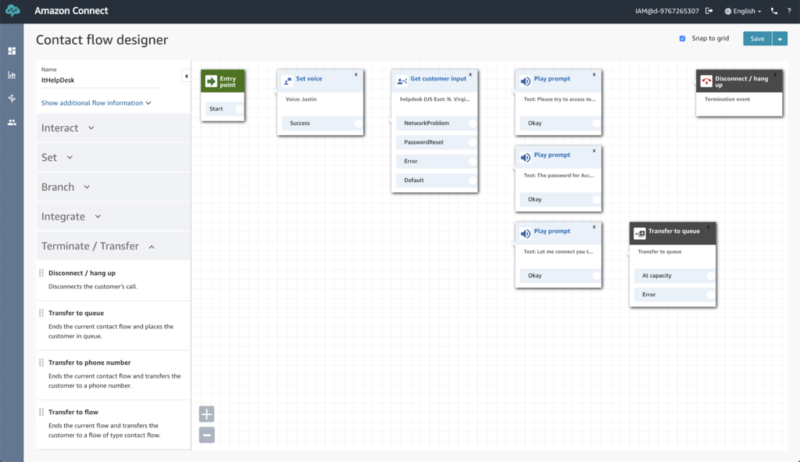
- すべての線を繋ぎ
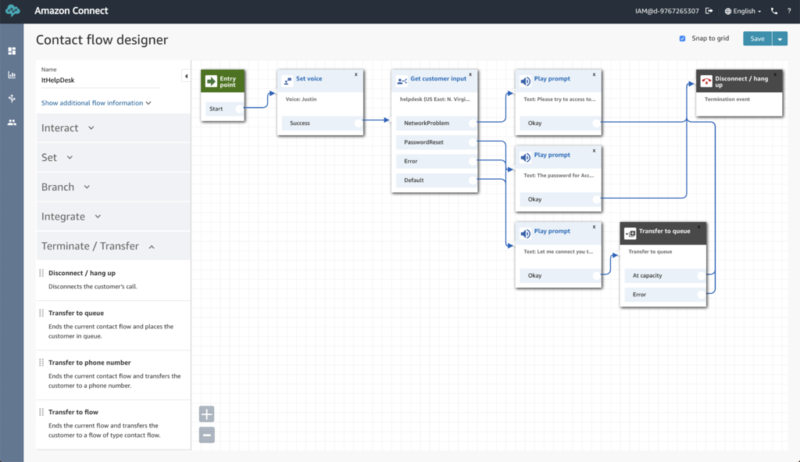
- 右上の ▼ から [Save & Publish] を選択すると作成完了です。

ワークフローを電話番号へ関連付け
- 左ペインから Phone numbers を選択し、取得した電話番号を選択します。

- 作成したコンタクトフローをプルダウンから選択し、保存します。
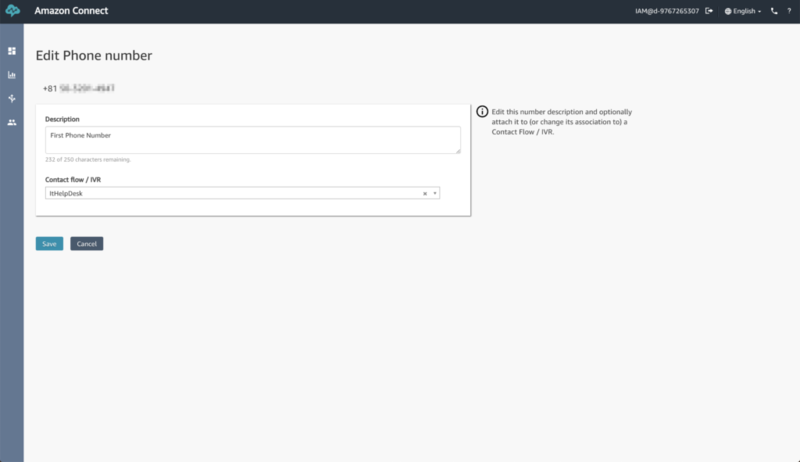
- ここまでできたら一度取得した電話番号に電話してみましょう。
電話で How can I help? と聞かれたら reset my password というと Lex にて設定したとおり Account ID を聞かれると思います。
ユーザデータ格納用 DB 作成
今回はユーザの情報を DynamoDB テーブルへ格納します。
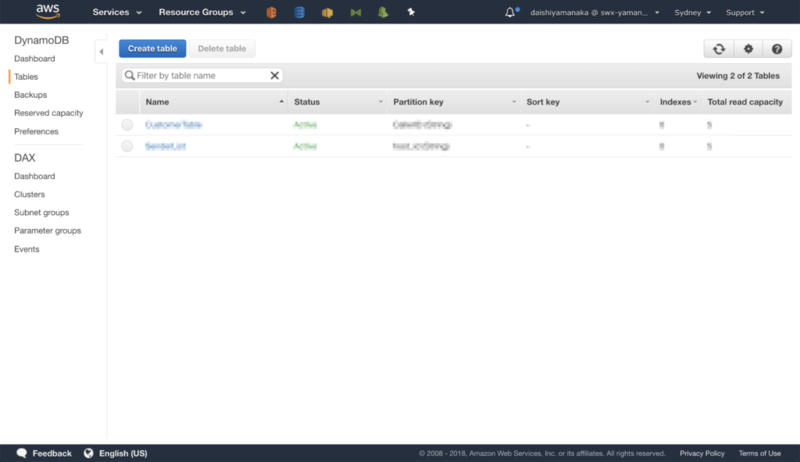
- DynamoDB から [Create table] ボタンをクリックします。
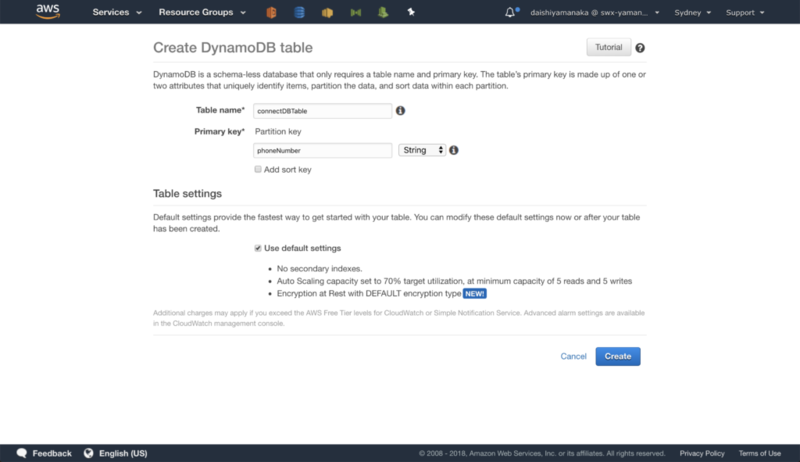
- テーブル名に任意の値を入力し、 Primary key に
phoneNumberを入力後、 [Create] ボランをクリックします。
これで、テーブルの作成は完了です。
ユーザデータへアクセスするための Lambda ファンクション作成
ユーザの情報を DynamoDB から取得及び登録するための Lambda ファンクションを作成していきます。
IAM ロール作成
作成する Lambda ファンクションからは DynamoDB へ接続する必要があるため、その権限をもつ IAM ロールを作成します。
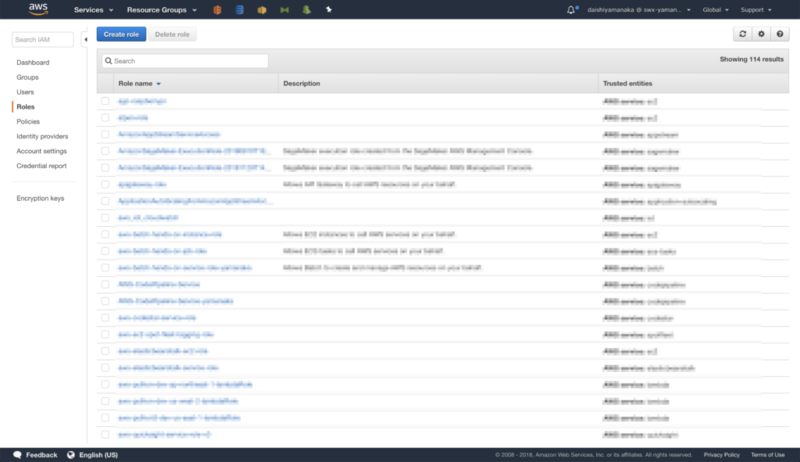
- IAM ロール から [Create role] ボタンをクリックします。
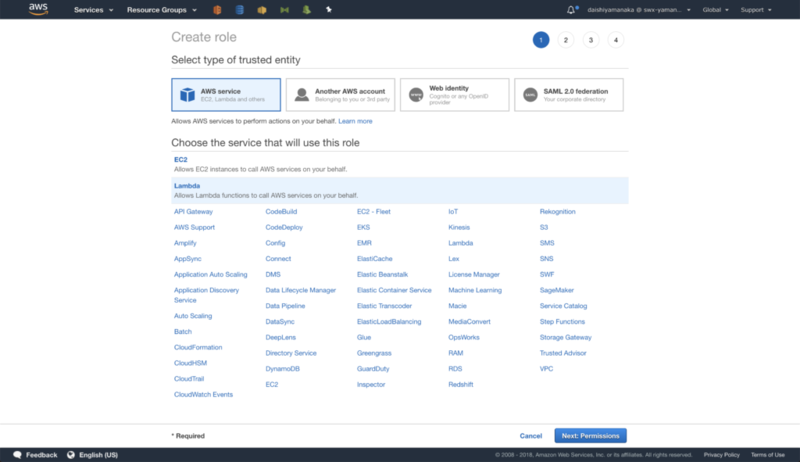
Lambdaを選択し [Next: Permissions] ボタンをクリックします。
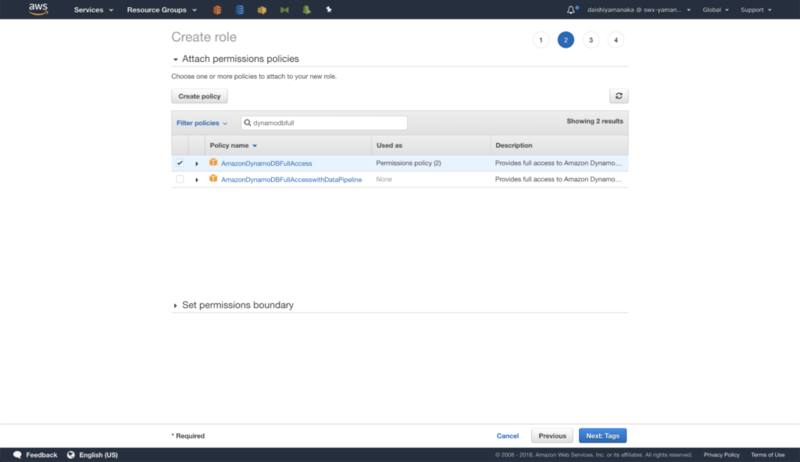
AmazonDynamoDBFullAccessを選択し [Next: Tags] ボタンをクリックします。
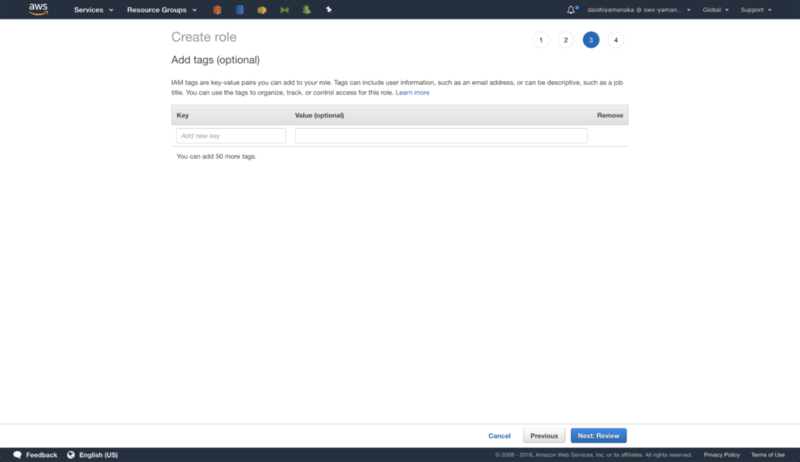
- [Next: Review] ボタンをクリックします。
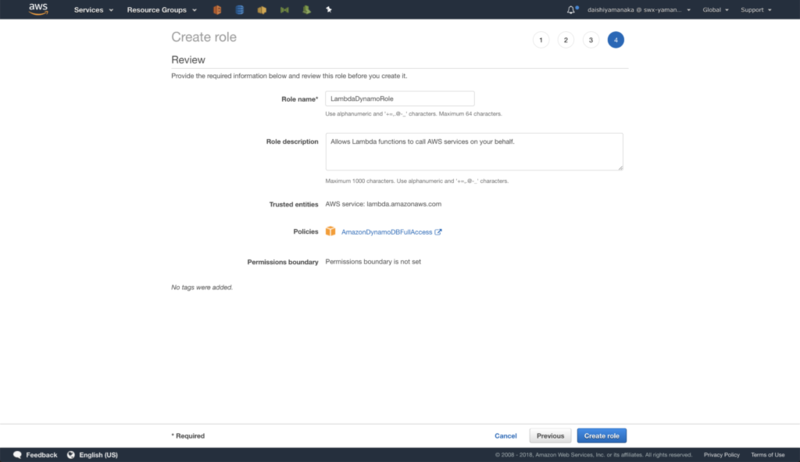
- ロール名に任意の値を入力し、 [Create role] ボタンをクリックします。
これで IAM ロールの作成は完了です。
Lambda ファンクション作成
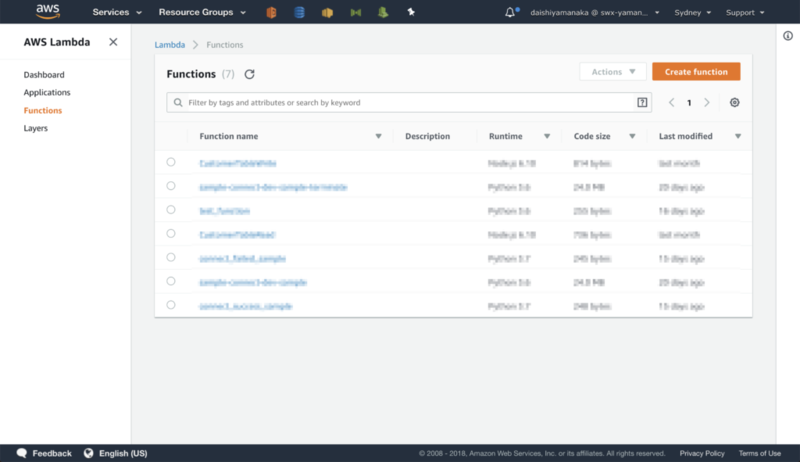
- AWS Lambda から [Create function] ボタンをクリックします。
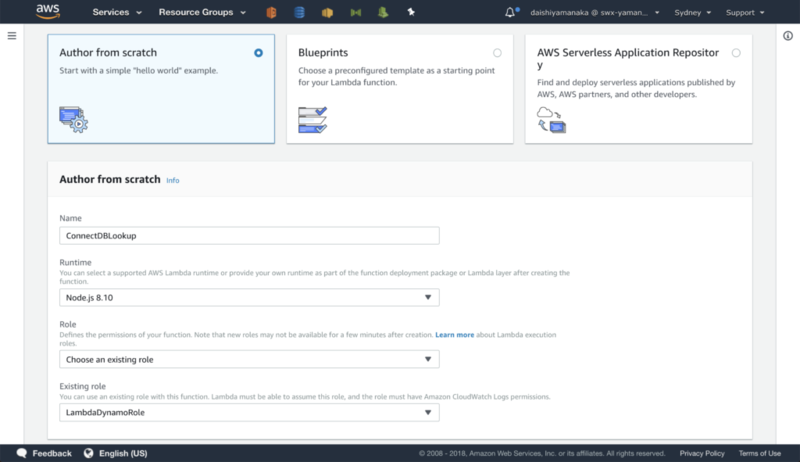
- 任意の名前を入力し、ランタイムに
Node.js 8.10、ロールに作成したロールを選択後、 [Create function] ボタンをクリックします。
- Function code に Amazon Connect Demo Site の [References] - [Dynamic Flow Lambda] の以下コードを貼り付けます。
// Get the AWS SDK and Dynamo SDKs ready
var AWS = require("aws-sdk");
var docClient = new AWS.DynamoDB.DocumentClient();

//Sets the timezone environment variable for the Lambda function
process.env.TZ = "America/New_York";

exports.handler = (event, context, callback) => {
    // set the options for the date format
    var dateOptions = {
        weekday: "short",
        year: "numeric",
        month: "short",
        day: "numeric"
    };

    // set the variables to record the current local date and time
    var currentShortDate = new Date().toLocaleDateString();
    var currentLongDate = new Date().toLocaleDateString("en-US", dateOptions);
    var currentTime = new Date().toLocaleTimeString("en-US");
    var currentTimeStamp = new Date().toString();

    //log the incoming event from Amazon Connect for troubleshooting purposes
    console.log("Received event from Amazon Connect at: " + currentTimeStamp);
    console.log("Amazon Connect Event Details: " + JSON.stringify(event));

    //set the variables for the customer ANI and unique contact ID
    var sourcePhoneNumber = event.Details.ContactData.CustomerEndpoint.Address;
    var currentContactId = event.Details.ContactData.ContactId;

    //set up the database query to be used to lookup customer information from DynamoDB
    var paramsQuery = {
        //DynamoDB Table Name.  Replace with your table name
        TableName: 'connectDemo',
        KeyConditionExpression: "phoneNumber = :varNumber",

        ExpressionAttributeValues: {
            ":varNumber": sourcePhoneNumber
        }
    };

    //set up the database query to be used to update the customer information record in DynamoDB
    var paramsUpdate = {
        //DynamoDB Table Name.  Replace with your table name
        TableName: 'connectDemo',
        Key: {
            "phoneNumber": sourcePhoneNumber
        },

        ExpressionAttributeValues: {
            ":var1": currentTimeStamp,
            ":var2": currentLongDate,
            ":var3": currentTime,
            ":var4": currentContactId,
        },

        UpdateExpression: "SET lastCalledTimeStamp = :var1, lastCalledDate = :var2, lastCalledTime = :var3, lastCalledCallId = :var4"
    };

    //use the lookup query (paramsQuery) we set up to lookup the customer data based on the source phone number from DynamoDB
    docClient.query(paramsQuery, function (err, dbResults) {
        //check to make sure the query executed correctly, if so continue, if not error out the lambda function
        if (err) {
            console.log(err); // an error occurred
            context.fail(buildResponseFailed);
        }
        //if no error occured, proceed to process the resutls that came back from DynamoDB
        else {
            //log the results from the DynamoDB query
            console.log("DynamoDB Query Results:" + JSON.stringify(dbResults));

            //check to ensure only 1 record came back for the customer phone number
            if (dbResults.Items.length === 1) {

                //set variables for the pertinet information from the returned database record:
                var lastCalledDate = dbResults.Items[0].lastCalledDate;
                var lastCalledTime = dbResults.Items[0].lastCalledTime;
                var customerFirstName = dbResults.Items[0].firstName;
                var customerLastName = dbResults.Items[0].lastName;

                //check to see if there is a record of a previous call, and set the previous call variable accordingly
                var customerFirstCall = true;
                if (lastCalledDate) {
                    customerFirstCall = false
                }

                //update the customer record in the database with the new call information using the paramsUpdate query we setup above:
                docClient.update(paramsUpdate, function (err, data) {
                    if (err) console.log("Unable to update item. Error: ", JSON.stringify(err, null, 2));

                    else console.log("Updated item succeeded: ", JSON.stringify(data, null, 2));

                });

                callback(null, buildResponseNumberFound(customerFirstName, customerLastName, lastCalledDate, lastCalledTime, customerFirstCall));
            } else {
                customerFirstCall = true;
                docClient.update(paramsUpdate, function (err, data) {
                    if (err) console.log("Unable to update item. Error: ", JSON.stringify(err, null, 2));

                    else console.log("Updated item succeeded: ", JSON.stringify(data, null, 2));

                });

                callback(null, buildResponseNumberNotFound(customerFirstCall));
            }

        }
    });
};


//This is the function that will be called on a successful callback if we find the phone number in our database
function buildResponseNumberFound(customerFirstName, customerLastName, lastCalledDate, lastCalledTime, customerFirstCall) {
    var results = {
        firstName: customerFirstName,
        lastName: customerLastName,
        lastCalledDate: lastCalledDate,
        lastCalledTime: lastCalledTime,
        firstCall: customerFirstCall,
        phoneNumberFound: true,
        lambdaResult: "Success"
    };
    console.log("Lambda's Response to Amazon Connect is: " + JSON.stringify(results));
    return results;
}


//This is the function that will be called on a successful callback if we don't find the phone number in our database
function buildResponseNumberNotFound(customerFirstCall) {
    var results = {
        firstCall: customerFirstCall,
        phoneNumberFound: false,
        lambdaResult: "Success"
    };
    console.log("Lambda's Response to Amazon Connect is: " + JSON.stringify(results));
    return results;
}

//This is the function that will be called on an error
function buildResponseFailed() {
    var results = {
        lambdaResult: "Error"
    };
    console.log("Lambda's Response to Amazon Connect is: " + JSON.stringify(results));
    return results;
}
34 行目及び 45 行目に connectDemo という文字列があるので、これを今回作成した DynamoDB テーブル名に修正後、タイムアウト値を 30 秒に変更し保存してください。
これで Lambda ファンクションの作成も完了です。
ワークフローに Lambda ファンクションを追加
先程作った Connect のワークフローに Lambda ファンクションを追加していきます。
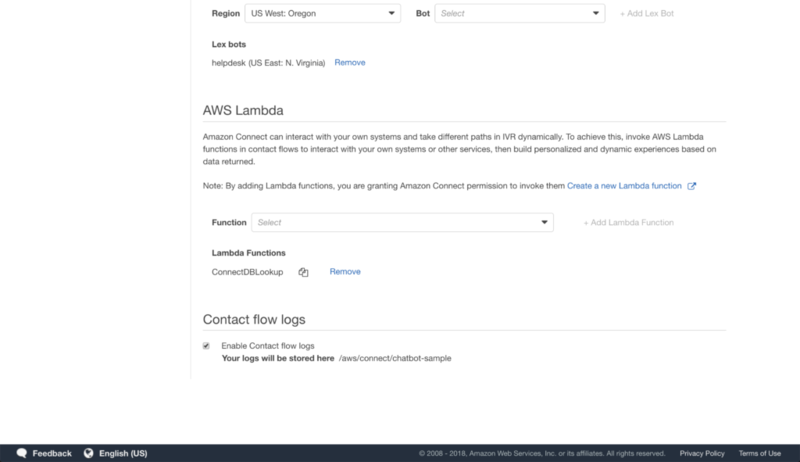
- Amazon Connect から今回作成したインスタンスの Alias を選択します。
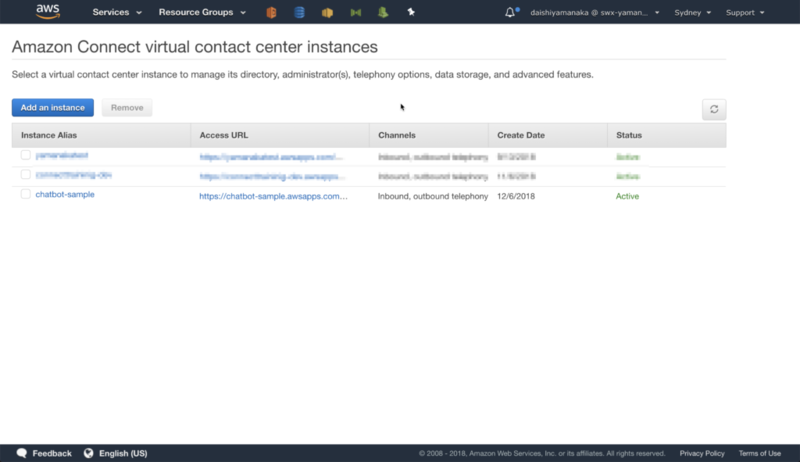
- 左ペインから Contact flows を選択し、作成した Lambda ファンクションを追加してください。 (こないだまでは CLI で権限付与してたんですがこっちのほうが便利ですね
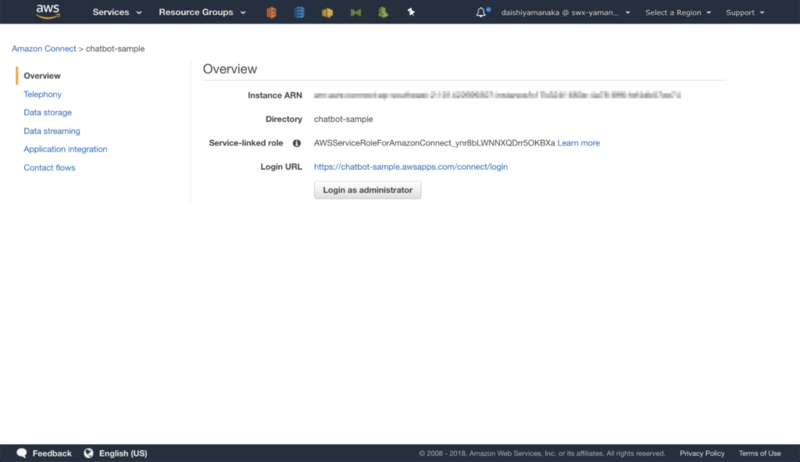
- 左ペインで Overview を選択し、 Login URL からログインします。
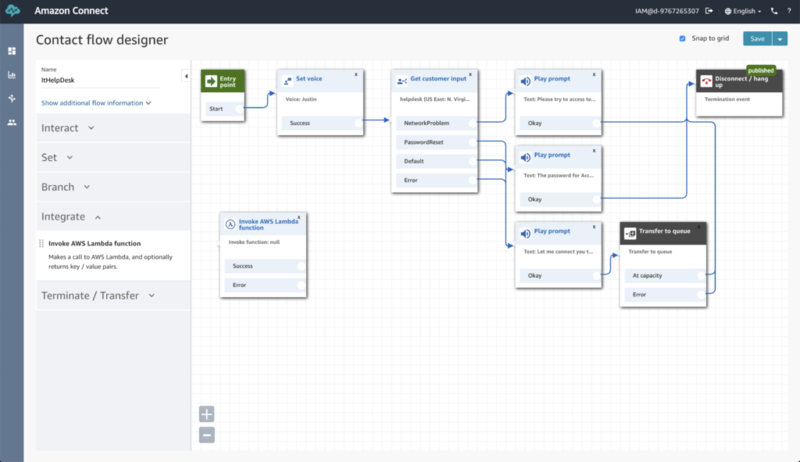
- 該当のコンタクトフローを開き、 Invoke AWS Lambda function をドラッグアンドロップします。
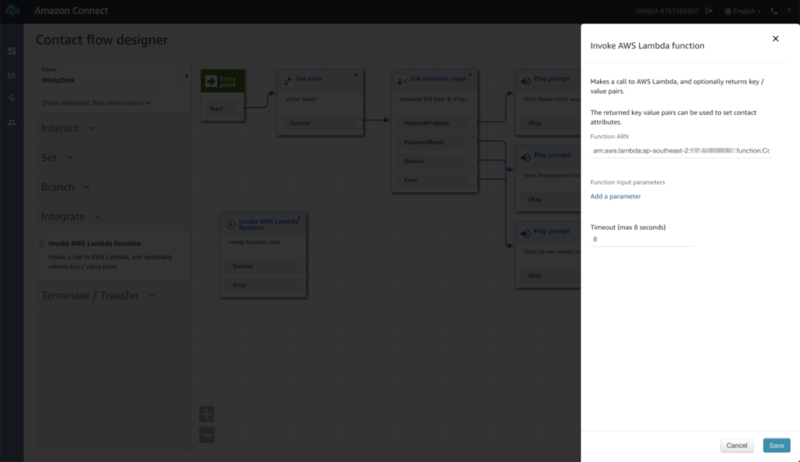
- Invoke AWS Lambda function を開き、作成した Lambda ファンクションの ARN を入力及びタイムアウト値を 8 秒に変更し保存します。
- Play prompt を 2 つ配置します。
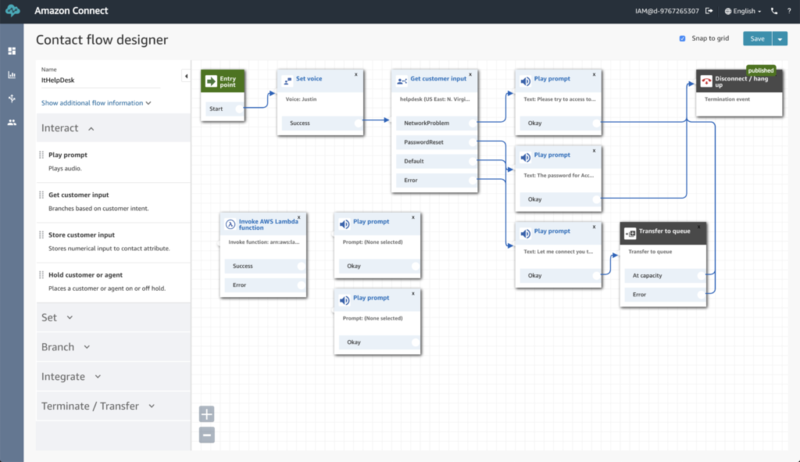
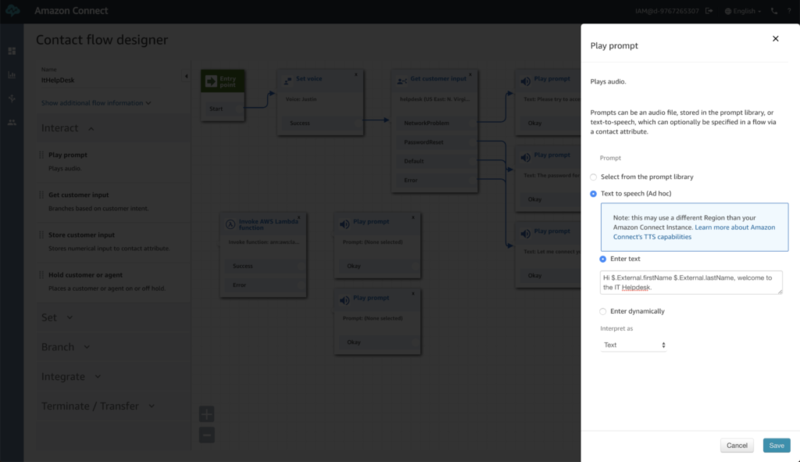
- 上の prompt を選択し
Hi $.External.firstName $.External.lastName, welcome to the IT Helpdesk.を入力します。
$.External.firstName 及び $.External.lastName には DynamoDB から取得した架電者の名前が入ります。
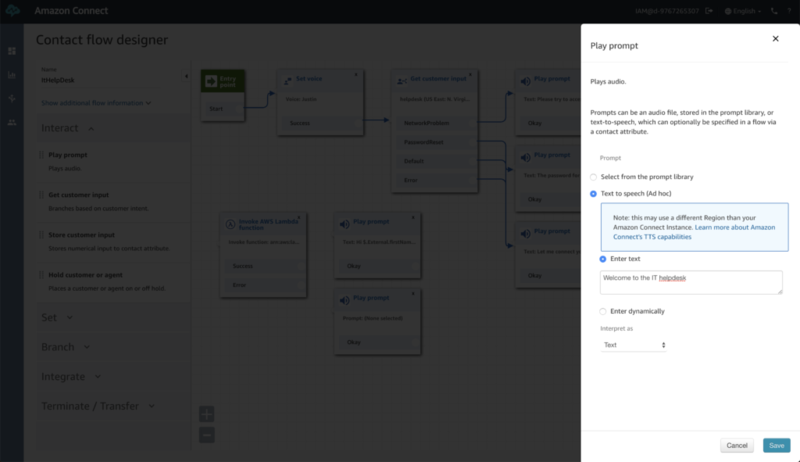
- 下の prompt には
Welcome to the IT helpdeskを入力します。
この prompt は架電者が DB に登録されていない場合に流れます。
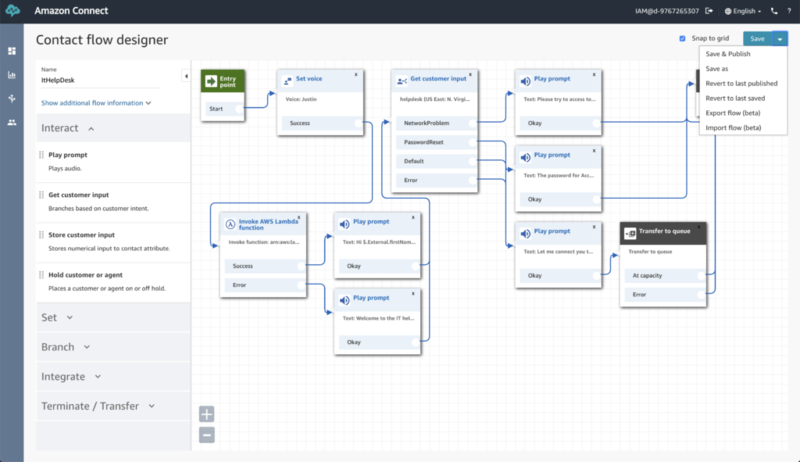
- フローを以下のように繋ぎ直し、 [Save & Publish] をクリックします。
これでフローの作成は完了です!
試してみよう
遂に完成しました。
早速 Amazon Connect で取得した電話番号に電話してみましょう。
以下のような会話ができるはずです。
私:(電話かける)

ボット:「Welcome to the IT help desk」

ボット:「How can I help?」

私:「Reset my password」

ボット:「What is your account ID?」

私:「123456789」

ボット:「The password for account ID 123456789 has been reset.」
電話をかけると DynamoDB に以下のようなレコードが登録されます。
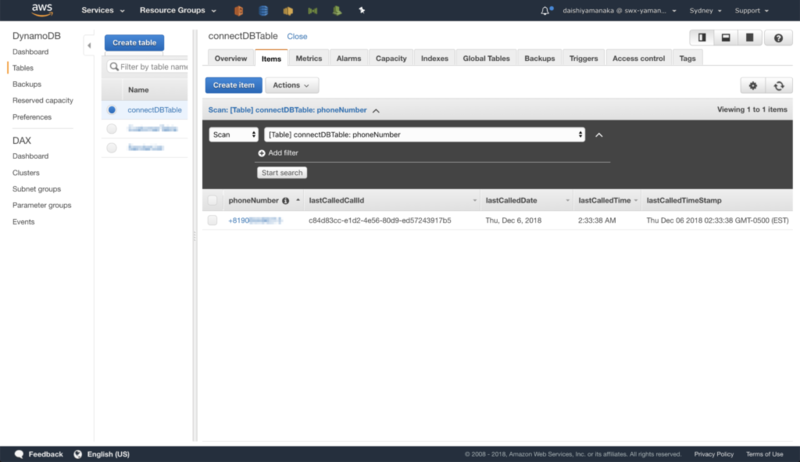
登録されたアイテムをクリックして、 firstName 及び lastName を追加します。
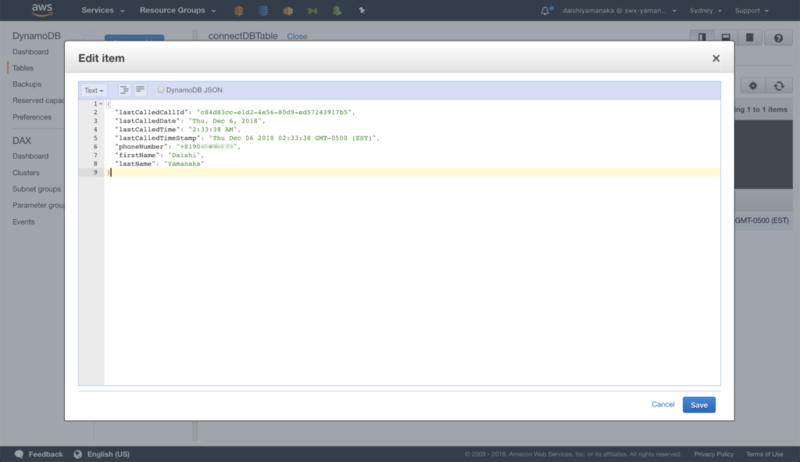
そして、もう一度電話をかけてみてください。
今度は以下のような会話ができるはずです。
私:(電話かける)

ボット:「Hi Daishi Yamanaka, Welcome to the IT help desk」

ボット:「How can I help?」

私:「I can't access the internet」

ボット:「Please try to access to the internet once more.」
おわりに
いかがでしょうか。
簡単にチャットボットを利用したヘルプデスクを作成することができました。
現在は残念ながら英語にしか対応していませんが、これから日本語対応がされればいろいろなところで活用できそうですね。

