

こんにちは!SRE2課 入倉です。
みなさん、運用の自動化してますか?
初投稿である今回はSystems Managerの機能であるIncident ManagerとAutomationを使って運用自動化を色々と試してみました!
はじめに
今回は以下の構成にてEC2でhttpdプロセスのアラートが発生したら、Incident Managerによる電話通知・インシデント起票、Automationでhttpプロセスを自動復旧・正常に復旧したらインシデントを自動クローズまで行います。

Incident Managerとは
CloudWatchアラームやEventBridgeのイベントをトリガーとしてインシデント起票し、その後の自動復旧の実行やメール、電話による通知が可能なサービスです。
Automationとは
自動復旧の際のアクションとして何をするかを定義した、オートメーションドキュメント(Runbook)を実行することで様々なタスクを自動化できます。
前提
- EC2のhttpdプロセスをCloudWatchにて監視できていること
(オプション)
- ChatbotでのSlack連携ができていること(以下記事参考)
Automationの設定
それでは早速、Automationの設定から行っていきます。
Runbookの作成
AWSで事前に定義されたランブックは数多くありますが、
今回はカスタムランブックの作成から行い、独自の内容をAutomationで実行します。
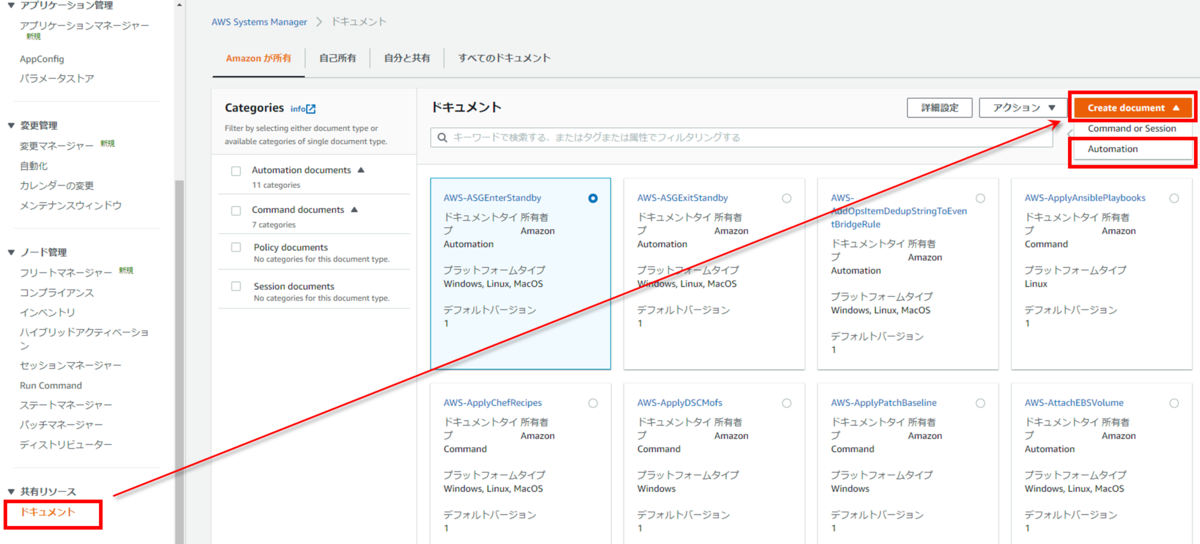
AWSアカウントにログインを行い、
「Systems Manager」 > 「ドキュメント」 > 「Create document」 > 「Automation」をクリック
「名前」を入力 > 「エディタ」 > 「編集」をクリック
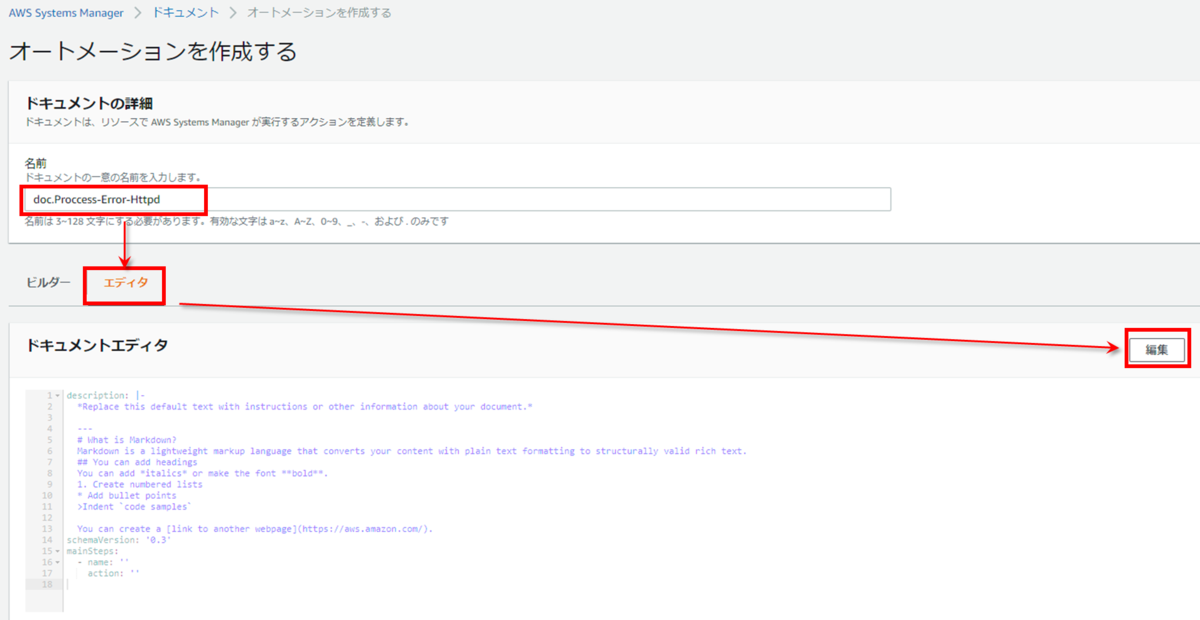
以下のyamlを「ドキュメントエディタ」内に貼り付けます。
※以下の箇所の"xxxxxxxxxxxx"はご自身のAWSアカウント番号に書き換える必要があります。
ActionPrefix: 'arn:aws:ssm-incidents::xxxxxxxxxxxx:response-plan/EC2Incident'
description: ''
schemaVersion: '0.3'
assumeRole: '{{ AutomationAssumeRole }}'
parameters:
  AutomationAssumeRole:
    type: String
    description: (Optional) The ARN of the role that allows Automation to perform the actions on your behalf.
mainSteps:
  - name: GetInstanceId
    action: 'aws:executeAwsApi'
    inputs:
      Service: cloudwatch
      Api: describeAlarms
      StateValue: ALARM
      ActionPrefix: 'arn:aws:ssm-incidents::xxxxxxxxxxxx:response-plan/EC2Incident'
    outputs:
      - Selector: '$.MetricAlarms[0].Dimensions[1].Value'
        Name: InstanceId
      - Selector: '$.MetricAlarms[0].AlarmName'
        Name: AlarmName
  - name: ListIncidentRecords
    action: 'aws:executeAwsApi'
    inputs:
      Service: ssm-incidents
      Api: ListIncidentRecords
      filters:
        - condition:
            equals:
              stringValues:
                - OPEN
          key: status
    outputs:
      - Name: IncidentRecordsTitle
        Selector: '$.incidentRecordSummaries[0].title'
        Type: String
      - Selector: '$.incidentRecordSummaries[0].arn'
        Name: IncidentRecordsArn
        Type: String
    nextStep: BranchIncidentTitle
  - name: BranchIncidentTitle
    action: 'aws:branch'
    inputs:
      Choices:
        - NextStep: HttpdRestartCommand
          Variable: '{{ListIncidentRecords.IncidentRecordsTitle}}'
          StringEquals: 'EC2Incident [{{GetInstanceId.AlarmName}}]'
    isEnd: true
  - name: HttpdRestartCommand
    action: 'aws:runCommand'
    inputs:
      DocumentName: AWS-RunShellScript
      InstanceIds:
        - '{{GetInstanceId.InstanceId}}'
      Parameters:
        commands: systemctl restart httpd
    nextStep: HttpdProccessCount
    onFailure: 'step:RebootInstance'
  - name: HttpdProccessCount
    action: 'aws:runCommand'
    inputs:
      DocumentName: AWS-RunShellScript
      InstanceIds:
        - '{{GetInstanceId.InstanceId}}'
      Parameters:
        commands: ps aux | grep httpd | grep -v grep | wc -l
    nextStep: BranchHttpdProccessCount
  - name: BranchHttpdProccessCount
    action: 'aws:branch'
    inputs:
      Choices:
        - NextStep: IncidentResolved
          Not:
            Variable: '{{HttpdProccessCount.Output}}'
            StringEquals: '0'
        - NextStep: RebootInstance
          Variable: '{{HttpdProccessCount.Output}}'
          StringEquals: '0'
  - name: IncidentResolved
    action: 'aws:executeAwsApi'
    inputs:
      Service: ssm-incidents
      Api: UpdateIncidentRecord
      arn: '{{ListIncidentRecords.IncidentRecordsArn}}'
      status: RESOLVED
    isEnd: true
  - name: RebootInstance
    action: 'aws:executeAwsApi'
    inputs:
      Service: ec2
      Api: RebootInstances
      InstanceIds:
        - '{{GetInstanceId.InstanceId}}'
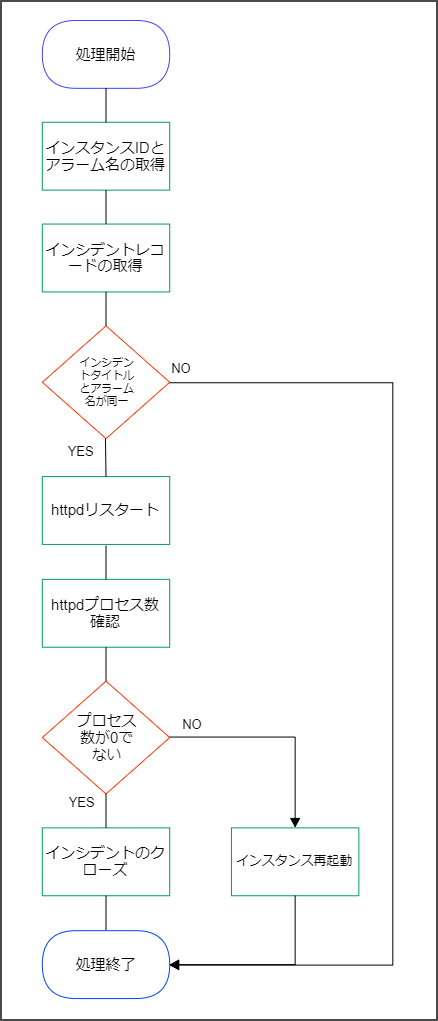
上記の内容をフローチャートの図にすると以下の流れとなります。
yamlの内容を入力したら「オートメーションを作成」をクリックします。
Incident Managerの設定
連絡先の登録
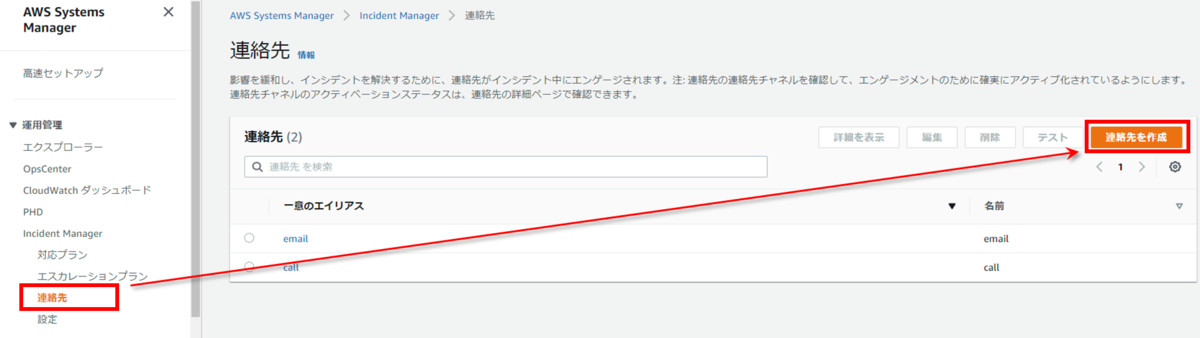
「Incident Manager」 > 「連絡先」 > 「連絡先を作成」をクリック
複数の連絡先が登録可能で、登録可能なタイプは以下となります。
- Eメール
- SMS
- 音声
今回は音声(電話)のみ登録します。
各項目を入力し、「作成」をクリック
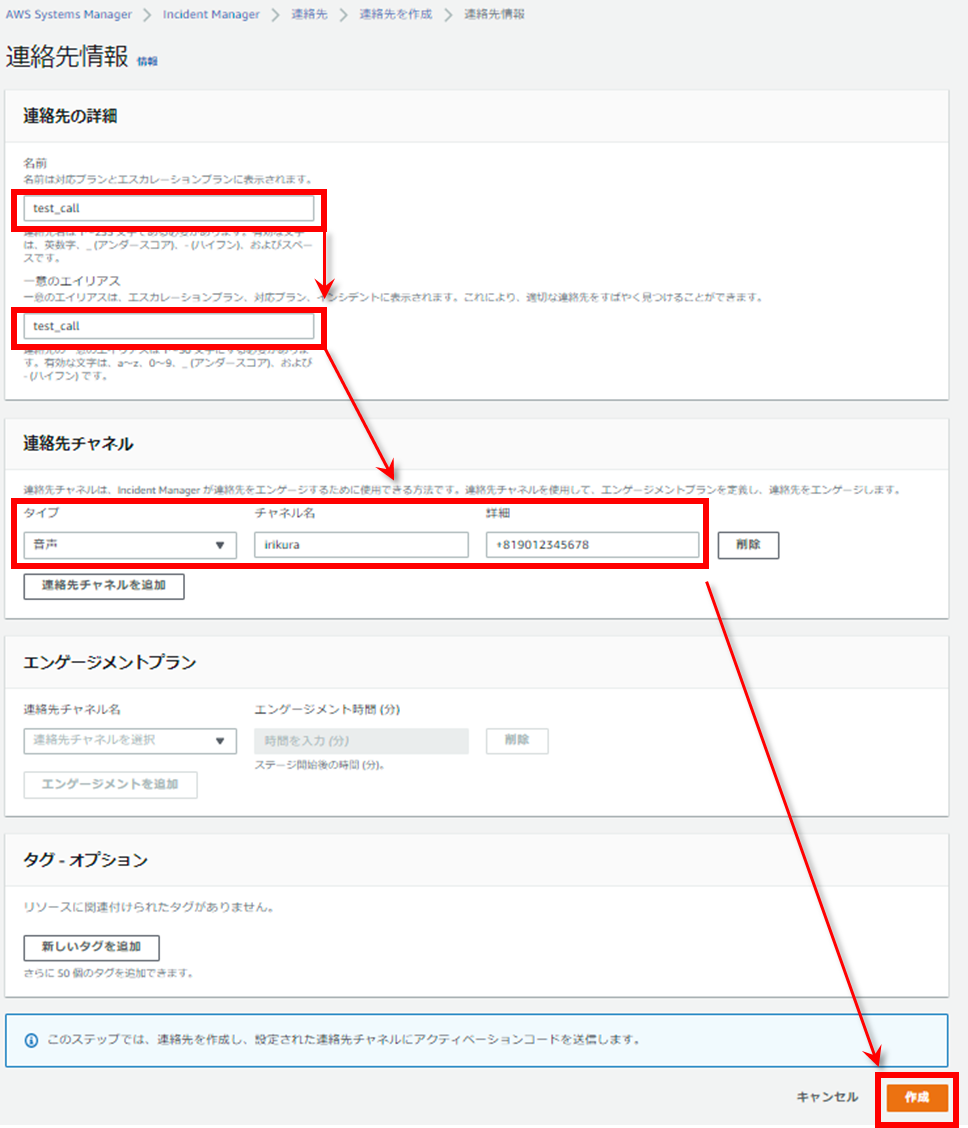
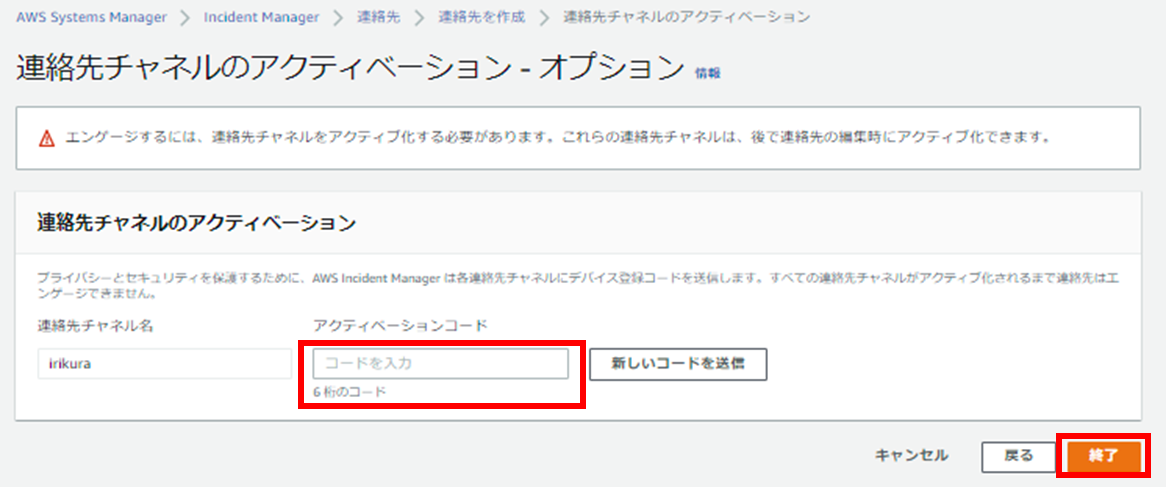
次の画面に遷移するとすぐに、登録した電話番号に電話がかかってきます。
英語で6桁のアクティベーションコードがお伝えされるので、心してヒアリングして下さい。
「アクティベーションコード」を入力 > 「終了」をクリック
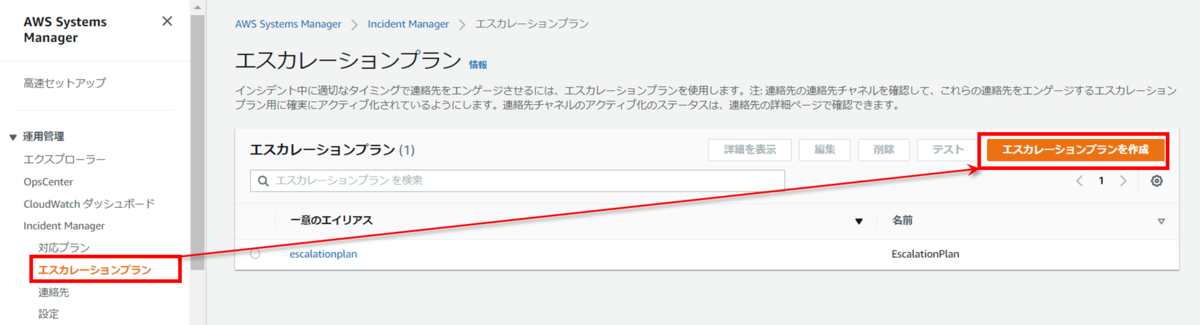
エスカレーションプランの作成
エスカレーションプランの設定では、連絡先に通知した際に電話を出れなかった(「承認」作業を実施しなかった)場合、また次の連絡先に通知を回すという設定が可能です。 電話で承認する場合は、電話が来たら「1」を押すことで承認となります。
今回は先ほど作成した連絡先1つのみの設定とします。
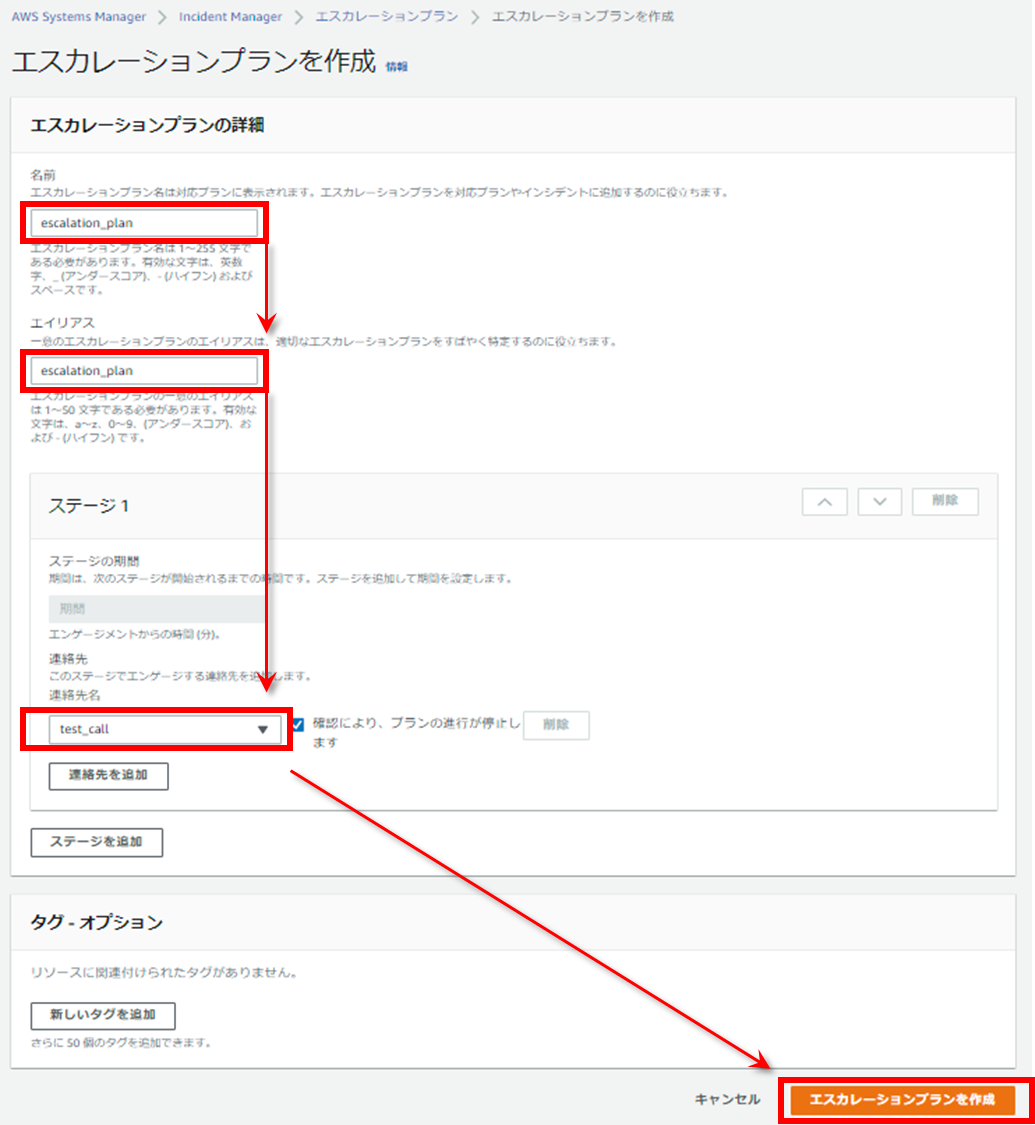
「Incident Manager」 > 「エスカレーションプラン」 > 「エスカレーションプランを作成」をクリック
各項目を入力し、「エスカレーションプランを作成」をクリック
対応プランの作成
対応プランの設定では、これまで作成したエスカレーションプランやランブック、Slack通知先のチャンネルなどを紐づける設定のテンプレートとなります。
「Incident Manager」 > 「対応プラン」 > 「対応プランを作成」をクリック
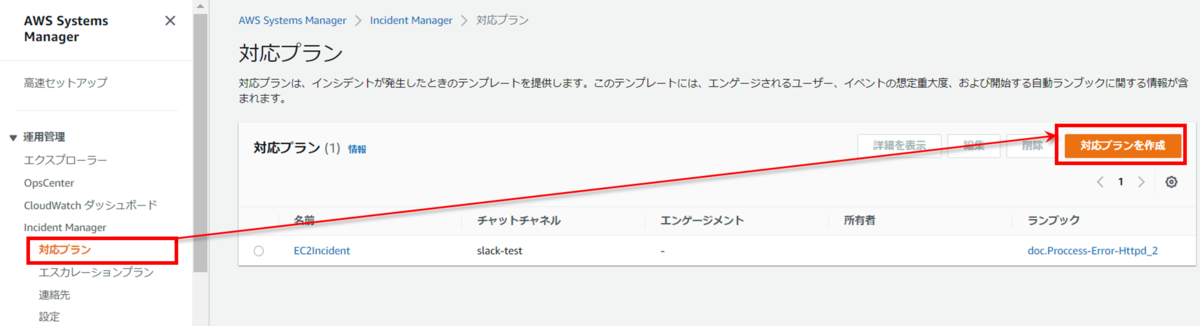
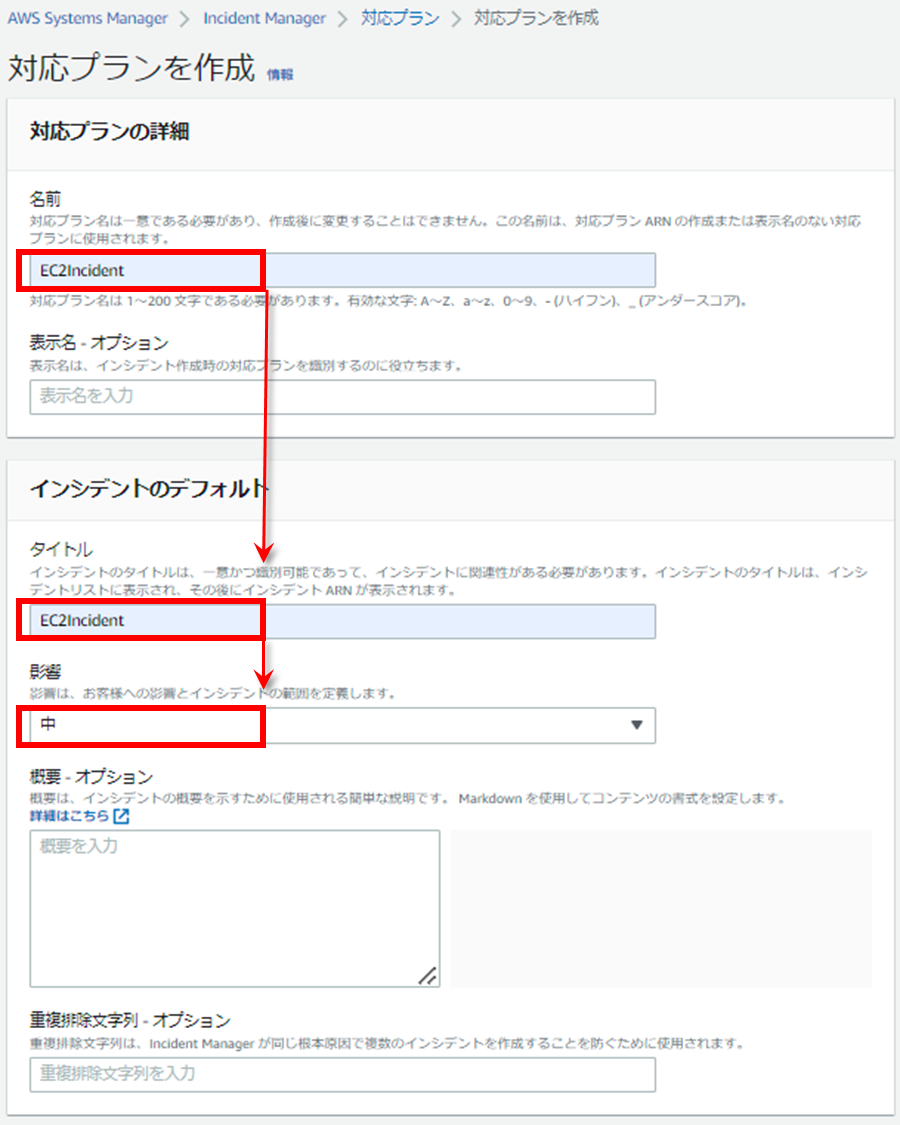
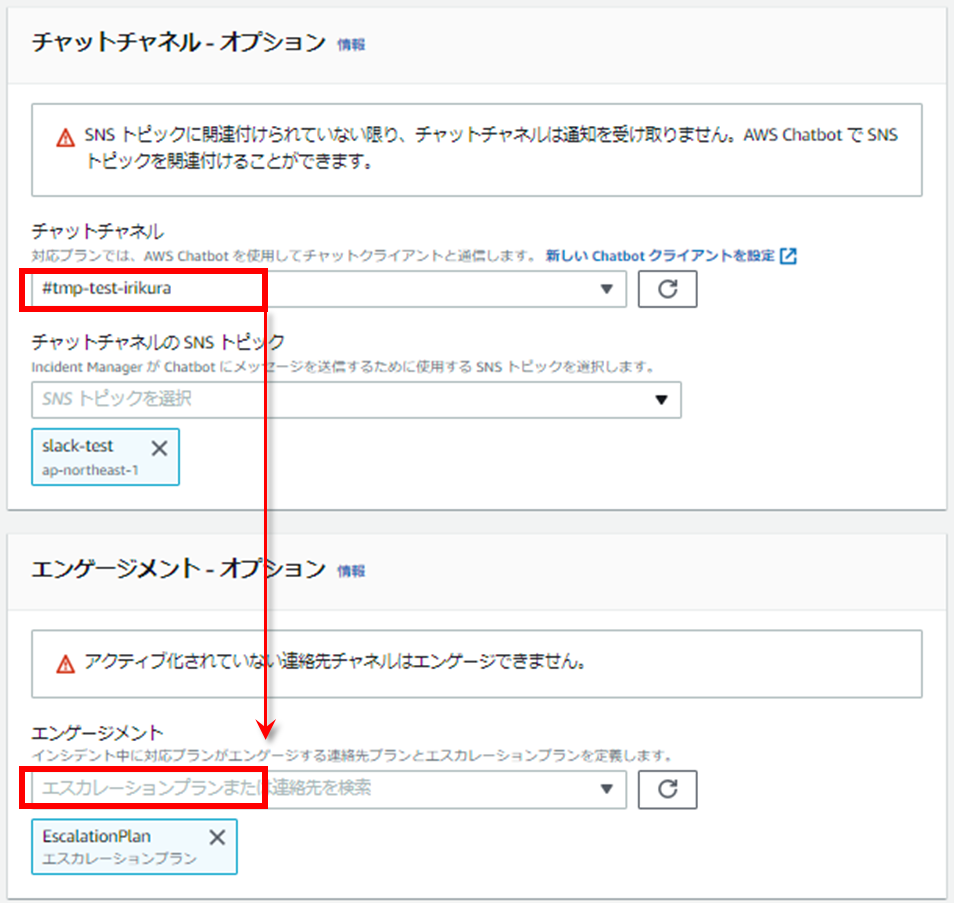
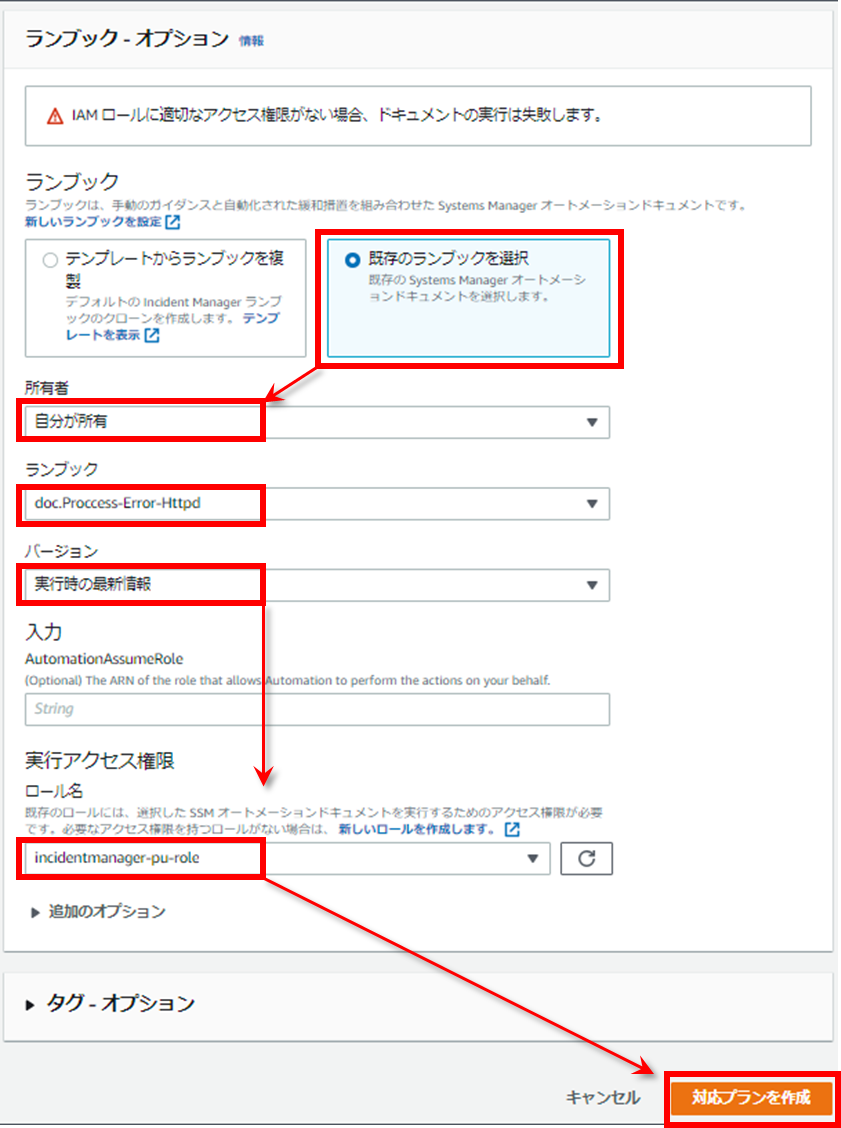
各項目を入力し、「対応プランを作成」をクリック
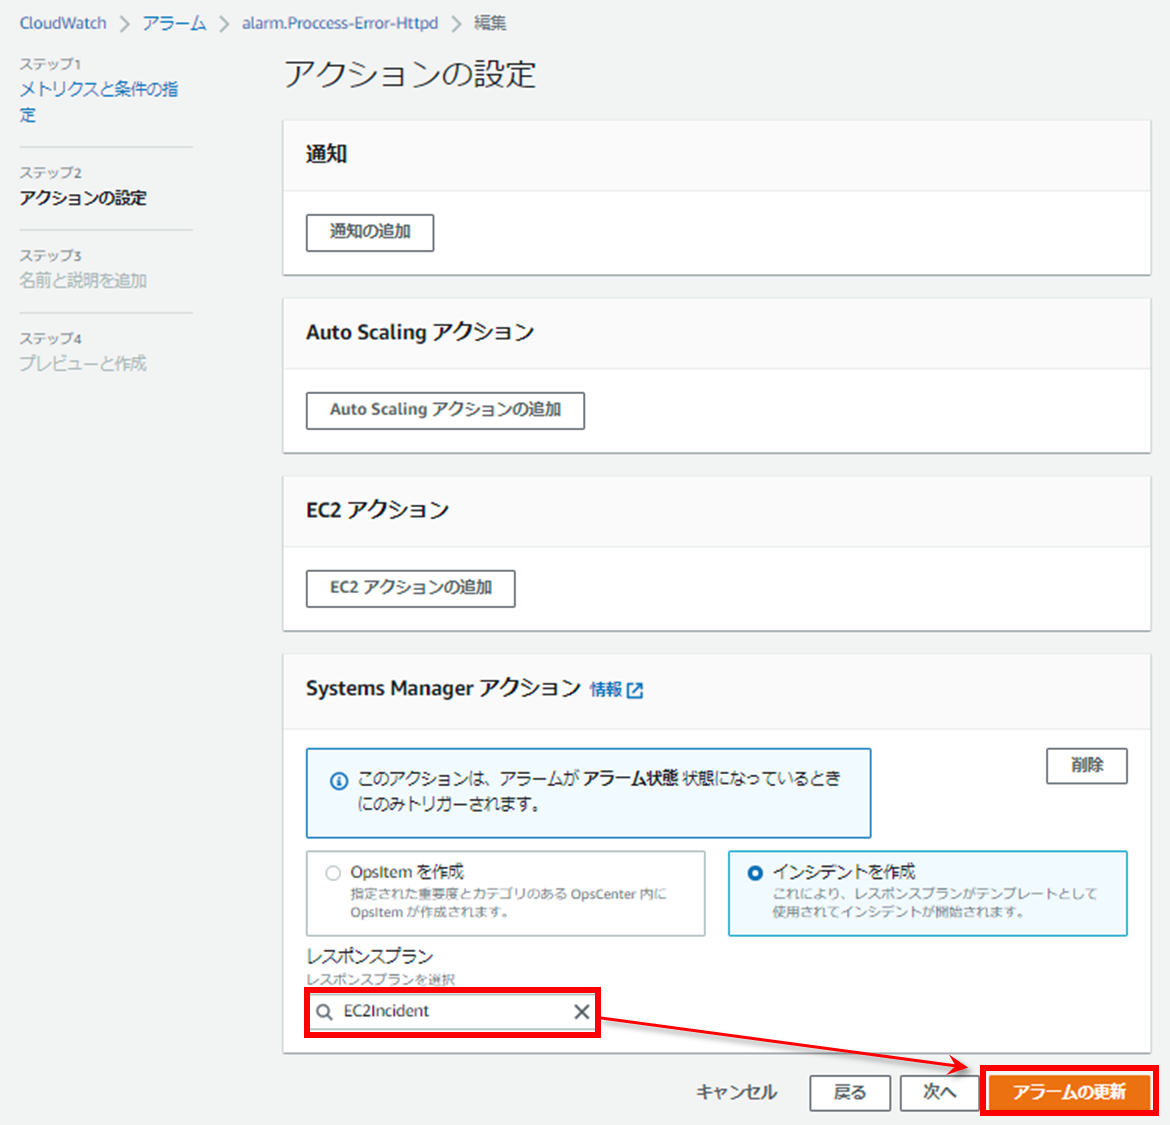
CloudWatchアラームと対応プランの紐づけ
前提条件のhttpdのCloudWatchアラームを選択して、編集画面のアクションの設定で先ほど作成した対応プランを選択して「アラームの更新」をクリックします。
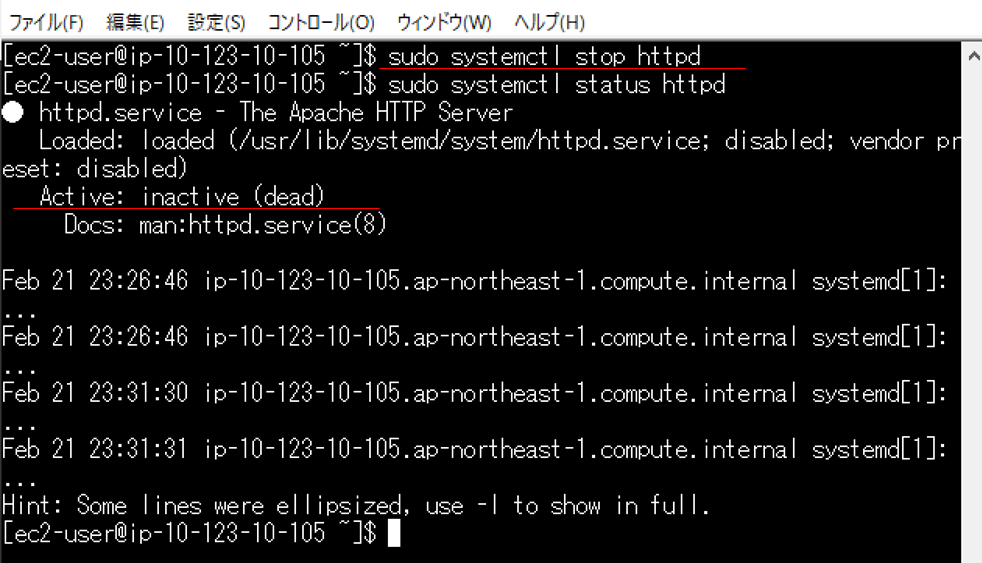
動作確認
それではhttpdプロセスを落としてみます。
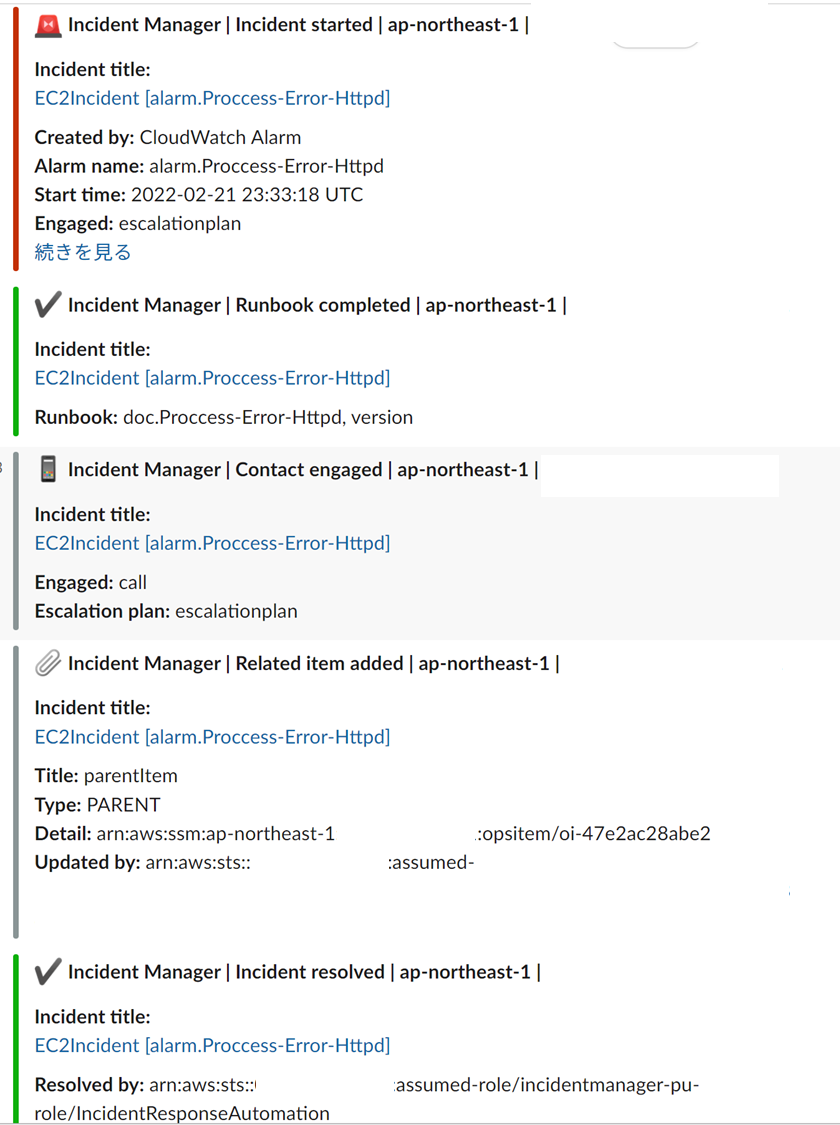
電話通知がすぐにきて、Slackを見ると以下の処理がされたという通知がきたのを確認できます。
- インシデントを開始
- ランブックが実行完了
- opsitemにインシデントを関連付け
- インシデントが解決済み
インシデントマネージャーを見ると、「オープン状態のインシデント」は何もなく、「解決済みのインシデント」に既になっていることが確認できます。
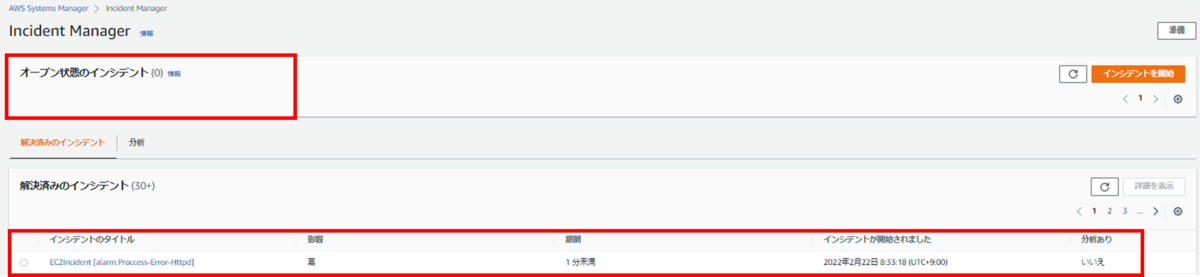
インシデントのタイトルをクリックしてみると、メトリクスの現在の状態やタイムライン、ランブックが成功したか、連絡先への通知をしたかなど詳細を見ることができます。

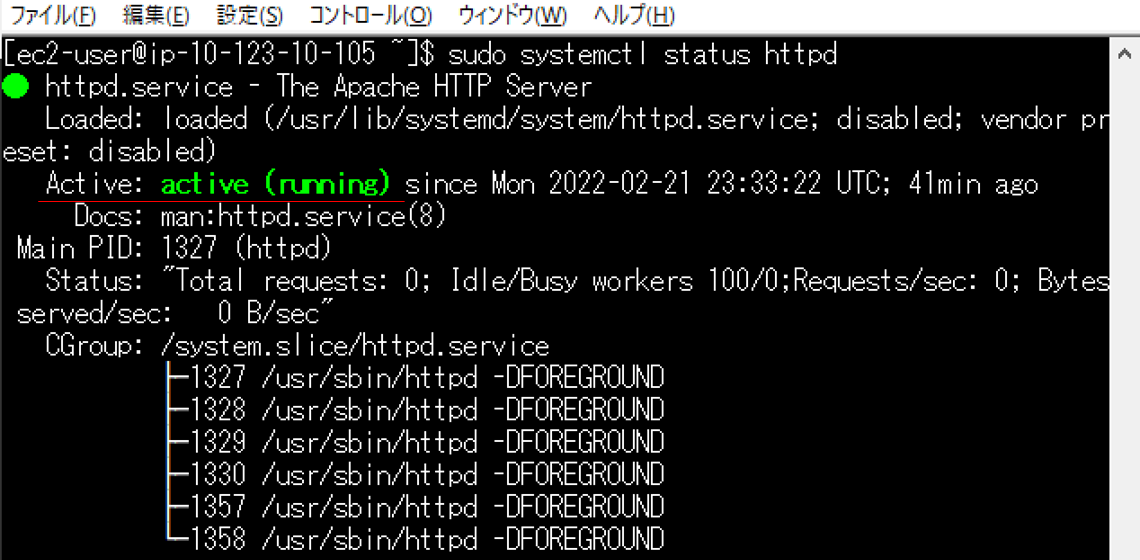
httpdのプロセスも無事「active」になっていました。
まとめ
運用の強い味方Incident Manager、Automationについてご紹介しました。
Incident Managerのセットアップは非常に簡単ですし、今回はランブックをカスタムで作成しましたが、既存のドキュメントが豊富にあったりなど簡単に自動化しやすいようになっていますので是非触って試してみてください。
本記事が運用自動化を目指す人の一助となれば幸いです。それではまたお会いしましょう!
入倉 翔吾(執筆記事の一覧)
クラウドインテグレーション部 SRE2課